
2 Week Japan Itinerary 2026: The Ultimate First-Timers Route
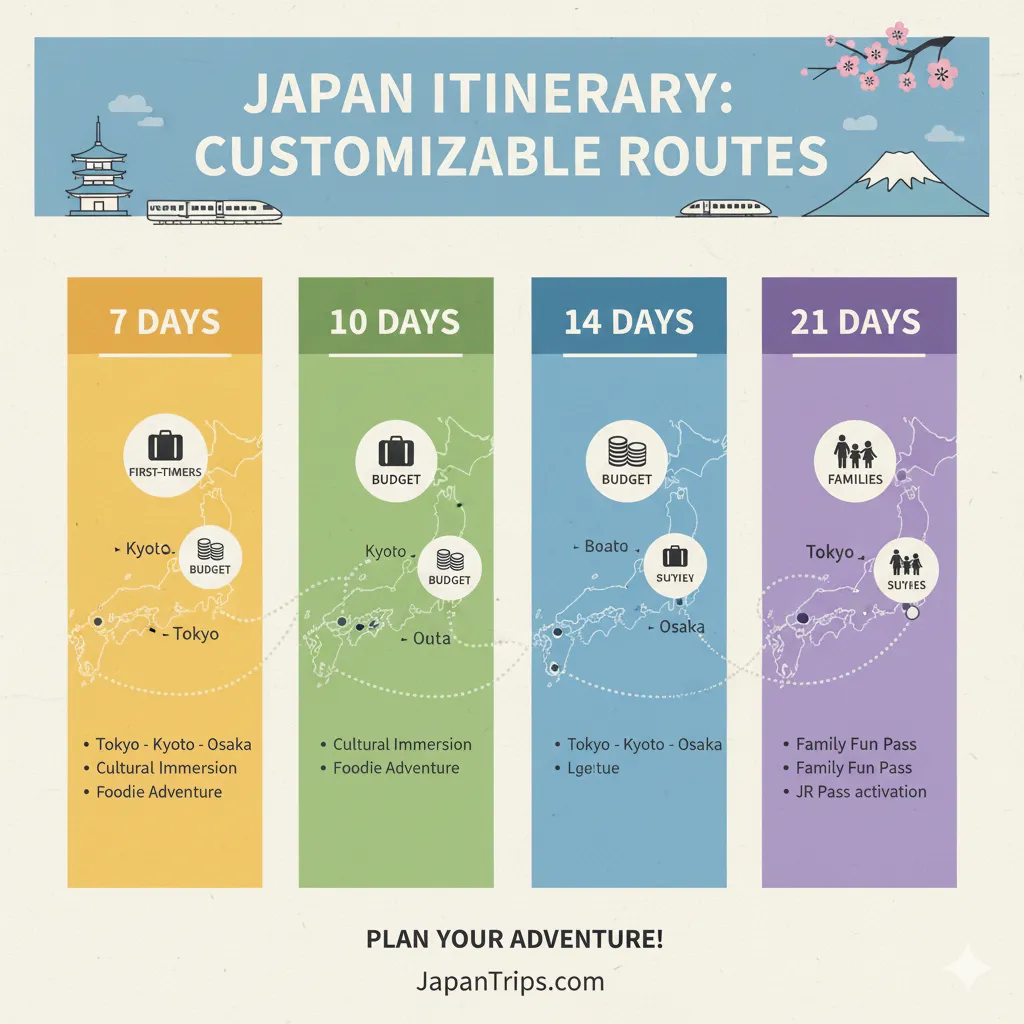
To plan your 2-week Japan itinerary, you need a mix of iconic cities, local culture, and efficient transportation. Combine popular destinations like Tokyo, Kyoto, and Osaka with unique experiences to make the most of your 14 days in Japan. It’s that simple.
The fact is, a solid itinerary can be the difference between a memorable vacation and a rushed experience. Nearly 70% of first-time travelers to Japan feel overwhelmed by the number of options. That’s why it’s essential to have a clear, well-structured approach to your trip. Each day should strike a balance between exploration and downtime.
The goal isn’t just to visit famous places; it’s to immerse yourself in Japanese culture and discover its unique beauty. By following a well-thought-out itinerary, you’ll enjoy a range of experiences—from Tokyo’s modern energy to the serenity of Kyoto’s temples.
- What to Know Before You Go (Quick Start)
- 2-Week Japan Itinerary at a Glance (Map + Day Split)
- Day-by-Day Plan (14 Days)
- Alternatives & Seasonal Swaps (Choose Your Own Adventure)
- Where to Stay (By City & Neighborhood)
- Getting Around Japan (JR Pass, IC Cards & Apps)
- Budget & Trip Costs (Per Day & Total)
- Food & Experiences You Shouldn’t Miss
- Packing List & Travel Essentials
- FAQs (Real User Questions)
What to Know Before You Go (Quick Start)
Before diving into what you need to know, let’s get down to brass tacks. Traveling to Japan can be an overwhelming experience, especially for first-timers. But don't sweat it; I've got your back.
One critical point is planning your itinerary. A 2 week Japan itinerary is ideal for seeing major cities like Tokyo, Kyoto, and Osaka. I recommend splitting your time wisely—at least 4 days in Tokyo, 3 in Kyoto, and 2 in Osaka. This allows you to soak in the local culture without feeling rushed. Remember: the journey is just as important as the destination.
Now, let's talk about transportation. Japan's train system is a marvel—clean, punctual, and efficient. The Japan Rail Pass can be a game-changer for tourists, saving you a good chunk of change if you plan on hopping between cities frequently. For example, a round trip from Tokyo to Kyoto could cost around $280 without the pass! So make sure to calculate if it fits your travel style.
I’ve seen many travelers make the mistake of underestimating how much cash they'll need. Even though Japan is technologically advanced, many shops and restaurants only accept cash. It’s wise to carry at least ¥10,000 (about $100) for daily expenses like food and transport. And don't worry too much about exchanging all your money before you go; ATMs that accept foreign cards are widely available.
The language barrier can also be intimidating. Sure, some people speak English, but a little effort goes a long way. Learning basic phrases will not only help you navigate daily interactions but also impress locals. I recommend downloading an app like Duolingo or Memrise to pick up essential vocabulary before you land.
Lastly, don’t forget about cultural etiquette! Simple gestures matter—a polite bow when greeting someone can work wonders in making connections. Knowing when to say “arigato” (thank you) shows respect and appreciation for the local culture.
So before embarking on your adventure with a Japan itinerary for 2 weeks, remember these essentials: plan your travels meticulously, keep cash on hand, learn some phrases, and embrace the culture! Now you're ready to explore the Land of the Rising Sun!
Your next step? Dive into our detailed breakdown of must-see attractions across each city.
Best Time to Visit (Sakura, Summer, Autumn, Winter)
Choosing the best time to visit Japan is crucial for experiencing its beauty, especially when considering the iconic cherry blossoms, the vibrant summer festivals, stunning autumn leaves, and serene winters. Each season offers a unique charm, but understanding these nuances can help maximize your experience.
The cherry blossom season, or sakura, usually blooms between late March and early April. This magical time draws tourists from around the globe. The streets and parks transform into a pink wonderland. I remember standing under a blooming sakura tree in Kyoto; it felt like stepping into a postcard. However, you need to plan ahead. Hotels fill up quickly, and prices soar by about 30-50% during peak bloom. Consider visiting early in April to catch the blossoms before the crowds arrive.
Summer in Japan (June to August) is hot and humid, but it’s also filled with lively festivals like Gion Matsuri in Kyoto or fireworks displays that light up the night sky. If you can handle the heat, you’ll be rewarded with unforgettable experiences. Pack light clothing, and don’t forget sunscreen! Remember to hydrate; temperatures can exceed 90°F (32°C). In my experience, this is also a great time for beach trips if you’re up for some island hopping in Okinawa.
Then comes autumn (September to November), where the landscape bursts into color with stunning red and gold foliage. It’s less crowded than sakura season but equally breathtaking. The peak foliage typically occurs in mid-November. I often suggest that travelers include a day trip to Nikko or Arashiyama during this time for incredible views of maple trees against traditional temples.
Lastly, winter (December to February) provides an entirely different perspective of Japan—think snow-covered mountains and hot springs. Places like Hokkaido are perfect for skiing or enjoying a dip in an onsen while surrounded by snowflakes. Winter illuminations also make cities sparkle at night; don’t miss the spectacular light displays in Tokyo's Shibuya or Shinjuku areas.
So, when planning your two-week itinerary, consider which seasonal highlights resonate most with you. By choosing wisely, you’ll create memories that last a lifetime—no matter which season you pick!
Visas, Money & eSIM: Fast Basics
If “Visas, Money & eSIM: Fast Basics” feels complex, here’s the useful part. Understanding these essentials can make or break your travel experience in Japan. It’s not just about having a passport; it’s also about ensuring you can communicate and manage your finances seamlessly while enjoying your trip.
First up, let’s talk visas. Most travelers heading to Japan for tourism will find that they don’t need a visa for stays of up to 90 days. However, this doesn't apply to everyone. Nationals from certain countries need to apply for a visa beforehand. Always check the latest requirements based on your nationality before you go.
Next is the money aspect. Japan is largely a cash-based society, which might feel like stepping back in time if you’re used to digital payments everywhere else. While major cities have ATMs that accept foreign cards, rural areas might not be so generous. A quick tip: try using a prepaid Suica or Pasmo card for easy travel and purchases on public transport. I’ve found that this small investment paid off big time during my trips.
- Currency: Japanese Yen (JPY). Familiarize yourself with bills and coins.
- ATMs: Look for international ATMs in convenience stores like 7-Eleven.
- Cash vs Card: Always carry some cash for smaller shops or restaurants.
- Tipping: Not customary in Japan; your service charge is included.
Now, let’s simplify eSIMs. If you’re traveling to Japan, getting online is crucial, especially if you want maps and translation apps handy. Instead of fumbling with physical SIM cards, consider an eSIM. It allows you to activate a data plan directly on your phone without needing to swap cards physically.
I remember feeling completely lost without internet access when I first arrived. Switching to an eSIM saved me time and frustration; I could connect right at the airport! Various companies offer short-term plans tailored specifically for tourists.
The key here is preparation—knowing about visas, having cash ready, and securing a reliable internet connection means less hassle and more enjoyment during your stay in Japan. And speaking of enjoyment, are you ready to plan your next adventure? Let’s dive into the must-see sights and experiences in the following section!
Safety, Etiquette & Tipping in Japan
Let’s break it down. Understanding the intricacies of safety, etiquette, and tipping in Japan is essential for a smooth trip. While many aspects of Japanese culture are incredibly welcoming, there are a few nuances that can make a big difference in how you're perceived and how your experience unfolds.
First up, let's talk safety. Japan is one of the safest countries in the world, with low crime rates and a strong sense of community. For instance, when I first visited Tokyo, I was amazed at how I could leave my bag unattended in a café without worrying. It's not just me; surveys consistently show that over 90% of visitors feel safe walking alone at night. Still, common sense goes a long way. Keep an eye on your belongings in crowded places like Shibuya Station or during festivals, where pickpockets might lurk.
Now onto etiquette—this is where you’ll want to pay attention. The Japanese place immense value on respect and politeness. Simple gestures like bowing when greeting someone can earn you big points. In restaurants, it’s customary to say "itadakimasu" before eating and "gochisousama deshita" afterward to thank the cook. Just recently, I noticed how a little act of politeness made my interactions much smoother—like saying "sumimasen" (excuse me) when asking for help.
- Be mindful of public transport: Speaking softly is appreciated; avoid phone calls while on trains or buses.
- Bowing: A slight bow shows respect; no need for deep bows unless in formal situations.
- Taking photos: Always ask permission first if you're taking pictures of people or private property.
Finally, let's tackle tipping—this one surprises many travelers. Tipping is generally unnecessary and can even be considered rude. Instead, exceptional service is expected as part of the job. However, if you’re really pleased with your experience at a restaurant, leave your payment on the table (just don’t hand it directly to the staff). During my last trip, I found that simply expressing gratitude worked wonders and built rapport with servers.
The key takeaway? Respect local customs around safety and etiquette to enhance your travel experience in Japan. Next up: let’s explore some practical tips for navigating transportation across cities like Tokyo, Kyoto, and Osaka!
2-Week Japan Itinerary at a Glance (Map + Day Split)

No-nonsense version: planning a 2-week Japan itinerary can feel overwhelming, but it doesn't have to be. Let’s break it down into manageable chunks that cover the highlights and give you a taste of Japan’s rich culture.
Your journey kicks off in Tokyo, where you'll spend the first few days soaking up the bustling city vibes. From there, it’s a quick trip to Kyoto for stunning temples and beautiful gardens. Then you can zip over to Osaka for some delicious street food. This mix gives you an authentic glimpse into both traditional and modern Japan.
Here’s how a well-structured 14 days in Japan looks:
- Days 1-4: Tokyo - Explore Shibuya, Shinjuku, and Asakusa. Visit the iconic Tokyo Tower and experience Akihabara's otaku culture.
- Days 5-6: Nikko or Hakone - Take a side trip to either Nikko for UNESCO World Heritage shrines or Hakone for hot springs and stunning views of Mount Fuji.
- Days 7-9: Kyoto - Get lost in the Arashiyama Bamboo Grove, admire Kinkaku-ji (the Golden Pavilion), and experience a tea ceremony.
- Days 10-11: Nara - Visit Nara Park to see the famous free-roaming deer and Todai-ji Temple with its giant Buddha statue.
- Days 12-14: Osaka - Feast on takoyaki and okonomiyaki, explore Dotonbori's neon lights, and visit Osaka Castle.
This itinerary balances sightseeing with cultural experiences. In my experience, this blend helps avoid burnout while still covering essential sights. It ensures your trip is filled with memorable moments rather than just ticking boxes off a list.
If you want to visualize this plan better, consider mapping it out. You'll see how conveniently these locations connect via the Shinkansen (bullet train). Trust me; riding that train is an experience in itself! The speed and efficiency are unbelievable—just make sure to reserve your seats ahead of time during peak seasons.
The key here is flexibility. Don’t stress if you don’t stick precisely to this plan. Adjustments are part of the adventure. Remember, Japan has so much more to offer beyond what’s listed here!
This overview should set you up nicely for navigating your travel plans as we delve deeper into practical tips for making your trip smooth sailing in the next section.
Golden Route Overview: Tokyo → Hakone → Kyoto → Nara → Osaka → Hiroshima/Miyajima → Tokyo
Critical point: the Golden Route is your ticket to a whirlwind experience of Japan. Connecting major cities and breathtaking landscapes, this itinerary can transform your two-week trip into an unforgettable adventure. Let’s dive deeper into this route: Tokyo → Hakone → Kyoto → Nara → Osaka → Hiroshima/Miyajima → Tokyo.
Starting in Tokyo, you’ll be immersed in a vibrant metropolis. There’s so much to see—from the bustling streets of Shibuya to the serene gardens of the Imperial Palace. You'll want to dedicate at least three days here to soak it all in, including visits to iconic sites like Senso-ji Temple and Akihabara’s tech wonderland.
Next, a short journey to Hakone is essential for a taste of Japan's natural beauty. Famous for its hot springs and views of Mount Fuji, it’s the perfect contrast to Tokyo's urban sprawl. A day trip works well; just don’t miss the chance to ride the Hakone Ropeway for stunning views!
Then, head to Kyoto, where history comes alive. With over 1,600 temples and shrines, planning is key. You should ideally spend around three days here visiting must-see spots like Kinkaku-ji (the Golden Pavilion) and Fushimi Inari Shrine with its thousands of torii gates. Trust me; you'll thank yourself later for not rushing this part.
Don’t overlook Nara. A quick day trip from Kyoto offers an incredible experience with free-roaming deer at Nara Park and Todai-ji Temple, housing an enormous Buddha statue. Just a couple of hours will give you enough time to appreciate its charm without overwhelming your schedule.
Your next stop is Osaka, known for its street food and lively atmosphere. Spend two days here indulging in local delicacies like takoyaki and okonomiyaki while exploring Dotonbori’s neon-lit nightlife.
The last leg takes you to Hiroshima and nearby Miyajima. This part of your journey is emotional but essential—visit the Peace Memorial Park in Hiroshima and see the iconic floating torii gate on Miyajima Island. Allocate at least a day or two for this segment; it will add depth to your understanding of Japan.
Finally, wrap up your itinerary back in Tokyo. This time, explore areas you may have missed or revisit your favorites before heading home. The round trip ends as it began, filled with memories that make your 14 days in Japan worthwhile.
This Golden Route isn’t just about seeing places—it’s about experiencing different facets of Japan's culture and history. As you plan, keep in mind that each city has its unique offerings that can enrich your journey. Now that you're equipped with this overvie
For a more extended experience, consider this Japan 3 weeks itinerary that allows you to explore even deeper into the culture and landscapes.
If you're planning an adventure, check out this guide for the best Japan in 2 weeks itinerary to make the most of your trip.
w, get ready for practical tips on how to navigate these cities effectively!
City-by-City Night Allocation (14 Days)
Allocating your nights wisely can make or break your 2-week Japan itinerary. When planning a trip, it’s not just about the sights you see during the day; where you sleep can significantly impact your overall experience. Let's break down the ideal night allocation by city.
Here's the scoop: you’ll want to maximize your time in Tokyo, Kyoto, and Osaka, while still enjoying the unique offerings of Hakone and Hiroshima. Each city has its own vibe and attractions, so here's a practical way to distribute your nights:
- Tokyo (5 nights): Start strong. Tokyo is vast and has endless things to explore—think Shibuya, Asakusa, and Akihabara. Having a solid five nights allows for day trips to nearby destinations like Nikko or Kamakura without feeling rushed.
- Hakone (1 night): A quick but essential stop. After all that urban energy, unwind in an onsen. The views of Mt. Fuji from Hakone are unbeatable. Just one night here is usually enough to soak in the atmosphere.
- Kyoto (4 nights): This is where Japan’s historical heart beats strongest. Spend four nights soaking in temples like Kinkaku-ji and Fushimi Inari Shrine, and leave room for side trips to Nara. Trust me; you'll need that extra time.
- Nara (1 night): If you’re really keen on seeing those free-roaming deer and beautiful parks, consider an overnight stay in Nara. It gives you time to explore at a relaxed pace.
- Osaka (2 nights): Known for its food scene and vibrant nightlife, two nights is sufficient to enjoy Dotonbori's street food while catching up on sleep after Kyoto's busyness.
- Hiroshima/Miyajima (2 nights): Give yourself a full two days here—the Peace Memorial Park deserves reflection time, plus Miyajima offers stunning views and friendly deer as well!
- Back to Tokyo (1 night): Wind down before your departure with one last night in Tokyo. Revisit favorite spots or check out anything you missed initially.
This plan totals 14 nights spread across six cities—leaving little room for regret. You get enough time to experience each city's essence without feeling overwhelmed. As someone who's been there, I can say that this balance strikes just right between exploration and relaxation.
And remember: some cities may have higher accommodation costs than others—especially Tokyo. Be mindful of your budget here! With this allocation strategy, you're primed for an unforgettable journey across Japan's most iconic destinations.
Next up, let’s dive into some crucial tips on navigating transport between these cities smoothly and efficiently.
Travel Times & How to Link Each Leg
Now, let’s break it down. Understanding travel times and how to link each leg of your journey is crucial for making your 2-week Japan itinerary smooth and enjoyable. You’ve already mapped out the Golden Route, but how do you actually get from point A to point B efficiently?
The key here is knowing the best modes of transportation available between cities. Japan’s public transport system is world-renowned, but if you’re not familiar with it, it can feel overwhelming. Most travelers favor the Shinkansen (bullet train) for intercity travel because it's fast and convenient. For instance, traveling from Tokyo to Kyoto takes about 2 hours and 30 minutes on the Nozomi train. Compare that to a bus which could take over 8 hours—big difference!
For some real-life context: I once underestimated the travel time between Osaka and Hiroshima while planning my trip. I thought I’d have time for a leisurely breakfast before heading to the train station—mistake! I barely made it in time, and missed a chance to explore more of Hiroshima. The takeaway? Always check train schedules ahead of time.
- Tokyo to Hakone: Approximately 1 hour by train (Odakyu Line).
- Hakone to Kyoto: Around 2 hours via Shinkansen.
- Kyoto to Nara: About 45 minutes by Kintetsu Limited Express.
- Nara to Osaka: Close to 45 minutes by JR Yamatoji Line.
- Osaka to Hiroshima: Roughly 1 hour and 30 minutes via Shinkansen.
The best part? You can use a Japan Rail Pass if you’re planning multiple Shinkansen rides; it can save you quite a bit of money. Just remember, you need to buy this pass before arriving in Japan—don’t wait until you're there!
A quick tip: download a transit app like HyperDia or Google Maps for real-time schedules and platform info. They can help you navigate any last-minute changes while you're on the go.
Your travel experience in Japan will be much richer when you plan your connections carefully. With this info under your belt, you’re all set for the next leg of your adventure. Up next: navigating the city layouts so you can make the most of your precious time in each destination.
Day-by-Day Plan (14 Days)
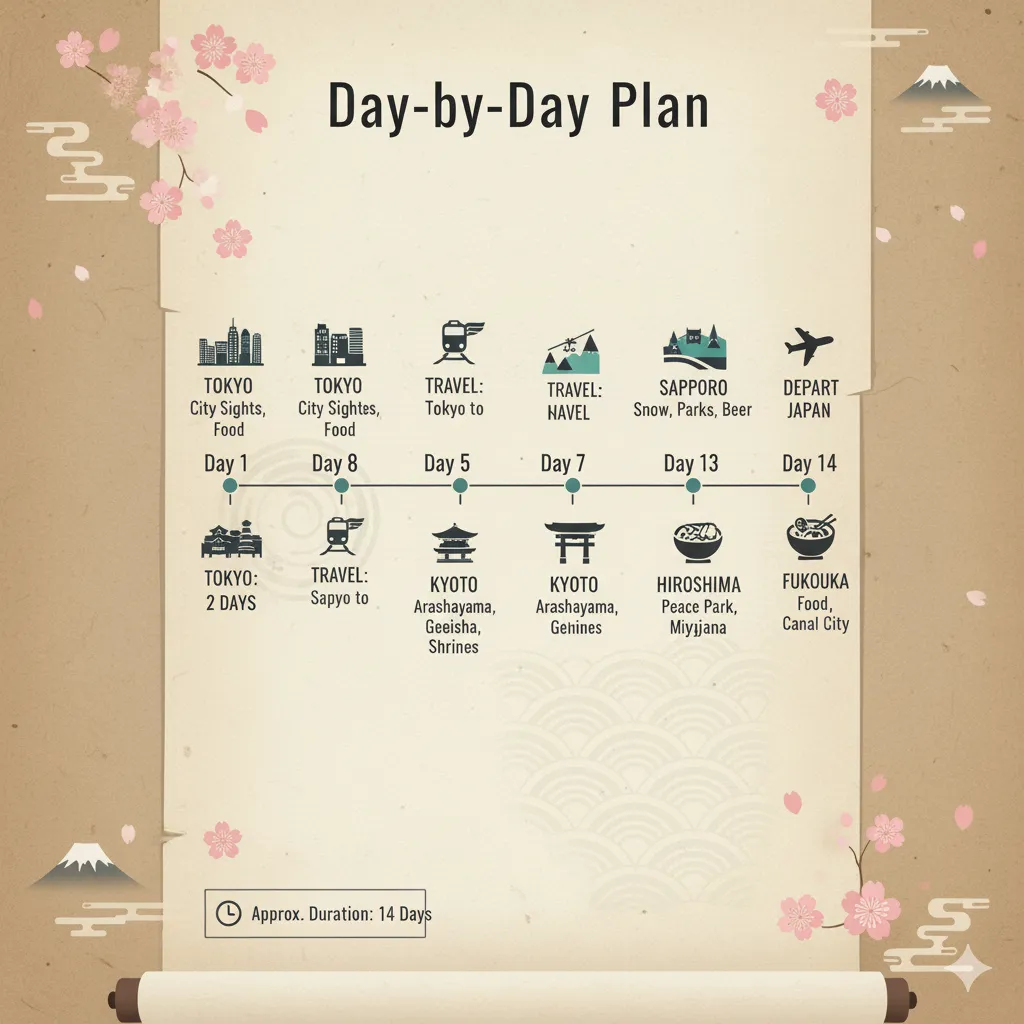
This is where it gets serious. Having a solid day-by-day plan for your 14 days in Japan can make or break your trip. Let’s break it down and make sure you’re getting the most out of every single day.
Your itinerary should balance exploration with relaxation, ensuring you soak in the sights without feeling rushed. Here’s a practical guide to how you might structure each day:
- Day 1: Arrival in Tokyo - Land at Narita or Haneda Airport, get your JR Pass activated, and settle into your accommodation. Spend the evening at Shibuya crossing and grab dinner at an izakaya.
- Day 2: Tokyo Exploration - Start with Asakusa and visit Senso-ji Temple. Then head to Akihabara for some shopping and anime culture. In the evening, visit Tokyo Tower or Skytree for panoramic views.
- Day 3: Day Trip to Nikko - Take an early train to Nikko. Explore UNESCO World Heritage sites like Toshogu Shrine. Return to Tokyo for the night.
- Day 4: Travel to Hakone - Morning train to Hakone. Relax in an onsen (hot spring) and enjoy views of Mt. Fuji from Lake Ashi. Consider staying at a ryokan for an authentic experience.
- Day 5: Hakone to Kyoto - After breakfast, explore the Open-Air Museum before heading to Kyoto via Shinkansen (bullet train). In Kyoto, visit Kinkaku-ji (Golden Pavilion).
- Day 6: Kyoto Temples - Full day in Kyoto visiting Fushimi Inari Taisha in the morning and Arashiyama Bamboo Grove in the afternoon. Don’t miss the Iwatayama Monkey Park!
- Day 7: More Kyoto and Nara Day Trip - Another day for Kyoto or take a short trip to Nara to see Todai-ji Temple and interact with the friendly deer in Nara Park.
- Day 8: Kyoto to Osaka - After breakfast, take a quick train ride to Osaka. Spend your day exploring Dotonbori’s vibrant street food scene!
- Day 9: Universal Studios Japan - Dedicate this day for fun at Universal Studios if you're into theme parks—get there early to maximize your time.
- Day 10: Osaka Exploration & Travel to Hiroshima - Visit Osaka Castle and then travel to Hiroshima in the afternoon. Check out the Peace Memorial Park upon arrival.
- Day 11: Miyajima Island Day Trip - Take a ferry from Hiroshima to Miyajima Island and see its famous floating torii gate. Enjoy fresh oysters for lunch!
- Day 12: Return to Tokyo - Head back to Tokyo via Shinkansen; spend some time shopping in Harajuku or check out new districts like Nakameguro.
- Day 13: Last-minute Tokyo Adventures - Choose between visiting Odaiba or taking a cooking class (a personal favorite!). Enjoy your last dinner in Japan at a sushi restaurant.
- Day 14: Departure - Depending on your flight schedule, squeeze in some last-minute sightseeing or shopping before heading to the airport.
This itinerary covers major cities efficiently but leaves room for serendipitous discoveries along the way—because let’s face it, that's often when you have your best travel experiences! In my experience, flexibility is key; if you find yourself enamored by a specific place, adjust accordingly.
The secret sauce here is not just sticking strictly to this plan but using it as a scaffold while leaving space for spontaneous adventures. With this plan laid out, you're primed for unforgettable experiences ahead—just remember, what comes next saves time as we dive deeper into how transport logistics link each leg of this journey.
Day 1–3: Tokyo Essentials (Shibuya, Asakusa, Akihabara)
Let’s zoom into what matters for Day 1–3: Tokyo Essentials (Shibuya, Asakusa, Akihabara). These areas are vibrant, packed with culture, and essential for kicking off your two-week Japan itinerary. You’ll get a taste of everything from traditional temples to the latest tech trends.
First up is Shibuya. This district is famous for the Shibuya Crossing, often called the busiest pedestrian crossing in the world. It's a perfect spot to snap some iconic photos. I recommend arriving early in the morning to experience it without the usual crowds. Explore the nearby Hachiko Statue and indulge in some shopping at Shibuya 109. It's a great way to get your bearings and dive into Tokyo's youthful energy.
Next on your list should be Asakusa, where you can visit Senso-ji, Tokyo's oldest temple. The atmosphere here is incredible, especially when you stroll down Nakamise Street leading up to the temple—grab some freshly made ningyo-yaki or melon bread from local vendors. Just so you know, try to plan your visit early in the day or later in the afternoon; midday can be quite hectic!
Lastly, don’t skip out on Akihabara, the mecca for tech lovers and anime enthusiasts. Here, you'll find countless electronics shops and themed cafes that provide a unique cultural experience. My favorite is browsing through the countless stores dedicated to anime figures—it's like stepping into another world! Also, if you're feeling adventurous, pop into one of the maid cafes for a quirky dining experience.
To wrap up your first three days, remember these essentials:
- Timing matters: Early mornings in Shibuya and Asakusa make a huge difference.
- Savor local foods: Don’t miss street food; it’s part of the adventure.
- Dive deep: Engage with locals; they'll enrich your experience.
The key here is to soak in each area while also allowing flexibility in your schedule for spontaneous discoveries. Trust me; you’ll create unforgettable memories that will set a solid foundation for your journey ahead. Now that you've mastered Tokyo's essentials, let's move on to exploring other cities that will complement your 14 days in Japan itinerary.
Day 4: Tokyo Day Trip Options (Nikko / Kamakura / Kawaguchiko)
Let's zoom into what matters for Day 4: Tokyo Day Trip Options (Nikko / Kamakura / Kawaguchiko). You’ve already immersed yourself in Tokyo’s vibrant neighborhoods, but now it’s time to explore the stunning sites just a train ride away. Each of these destinations offers its own unique charm and experiences, making them perfect escapes from the bustling city life.
Nikko is famed for its breathtaking temples and natural beauty. The UNESCO World Heritage Site of Toshogu Shrine is a must-see, showcasing intricate carvings and ornate architecture. From Tokyo, you can reach Nikko in about two hours by train. Pro tip: visit during the early morning to avoid crowds and soak in the serene atmosphere. In my experience, spending around half a day here allows you to appreciate the main attractions without rushing.
Next up is Kamakura. Known for its Great Buddha and beautiful coastal scenery, this town is a delightful blend of culture and relaxation. Just an hour from Tokyo, it's perfect for a quick getaway. I recommend hiking the trails connecting the various temples—like Hase-dera and Kencho-ji—providing both spiritual enlightenment and gorgeous views. Grab some matcha ice cream from a local vendor; trust me, it's worth it!
If you're drawn to nature, consider visiting Kawaguchiko, located near Mount Fuji. It’s famous for its stunning lake views with the iconic mountain as a backdrop. The journey takes about two to three hours by train and bus combination. A boat ride on Lake Kawaguchi is magical, especially at sunset. And don’t forget your camera—the views are breathtaking!
- Nikko: Home to Toshogu Shrine and stunning natural beauty.
- Kamakura: Famous for its Great Buddha and hiking trails.
- Kawaguchiko: Offers picturesque views of Mount Fuji.
With these options available, choose based on what sparks your interest most—cultural heritage, coastal vibes, or nature escape. No matter where you decide to go, each destination enhances your 14-day Japan itinerary by adding layers of experience beyond Tokyo's neon lights.
As you prepare for this excursion, remember: flexibility is key. Enjoy your adventures today and stay tuned as we head towards more captivating cities in our journey through Japan!
Day 5: Hakone & Fuji Views (Onsen, Lake Ashi)
What makes Day 5: Hakone & Fuji Views (Onsen, Lake Ashi) so special? It’s where your Japan itinerary truly comes alive. Imagine waking up to stunning vistas of Mount Fuji while relaxing in an onsen. This day isn’t just about the sights; it’s about soaking in a cultural experience that will stick with you long after you leave.
Hakone is one of those must-see spots, especially for first-time visitors. The area is famous for its hot springs, art museums, and views of Japan's iconic peak. Start your day by hopping on the Hakone Tozan Railway, which offers scenic views as it climbs through the mountains. In my experience, it's exhilarating to watch the landscape transform from urban to lush greenery.
After a quick breakfast in Hakone, head straight for Lake Ashi. You can take a leisurely cruise on the lake while enjoying breathtaking views of Mount Fuji. Opt for one of the pirate ships—it sounds cheesy, but trust me, it's worth it! You'll get great photo ops and even better memories.
Next, don't miss out on the onsen experience. There are many public baths around Hakone where you can relax and unwind. If you're shy about being naked in front of strangers (who isn’t?), look for private onsen options. I found that spending an hour soaking in mineral-rich waters after a day of sightseeing was rejuvenating beyond words.
Here's a practical tip: try to visit during the morning hours for fewer crowds and clearer views of Fuji. Plan your visit around local weather reports because clear days reveal the mountain perfectly—it's truly an awe-inspiring sight. Whether you’re standing by the lake or lounging in the onsen, when Fuji's peak comes into view, you'll understand why this area is so revered.
This combination of nature and relaxation wraps up your fifth day beautifully. And as you prepare to move onto Day 6—where you'll immerse yourself in Kyoto's rich history—you'll carry these serene moments with you.
Day 6–9: Kyoto Highlights (Fushimi Inari, Arashiyama, Gion)
Here’s where it gets interesting. After absorbing the vibrant life of Tokyo, you’re ready to step into the historical heart of Japan—Kyoto. Over the next few days, you'll explore stunning temples, lush landscapes, and the essence of traditional Japanese culture.
Starting with Fushimi Inari Taisha, this iconic shrine is famous for its thousands of vermillion torii gates winding up the sacred Mount Inari. The hike to the summit takes abou
If you're planning a trip, be sure to check out this guide on tokyo 5 days to make the most of your time in the city.
t 2 hours if you pace yourself—perfect for a morning adventure before the crowds arrive. What makes Fushimi Inari particularly special is not just its beauty but also its spiritual significance; you’ll find locals praying as they walk through these gates. A personal tip: go early in the morning or later in the evening for a serene experience.
Next on your Kyoto itinerary is Arashiyama, home to the breathtaking Bamboo Grove. Walking through these towering stalks is like stepping into another world. Take a moment here to reflect; it’s one of those places where time seems to stand still. If you have extra time, consider visiting the Iwatayama Monkey Park located nearby, where wild monkeys roam freely and views of Kyoto from above are simply spectacular.
As dusk falls, head over to Gion, Kyoto’s famous geisha district. It's unlike anything else you'll see in Japan. You might catch a glimpse of a geisha gracefully making her way to an appointment, which is a rare and beautiful sight. Explore the lantern-lit streets and enjoy some traditional kaiseki cuisine at one of Gion's restaurants; it’s worth every yen.
In my experience, Gion really encapsulates the spirit of Kyoto; it's a place where history breathes through every alleyway and building. Don’t rush through this area; take your time to savor each moment.
By now, you're starting to see how Kyoto offers a different pace compared to Tokyo—more reflective, more connected to tradition. And while you're soaking in all this culture, remember that each spot has layers waiting to be uncovered.
With so many highlights packed into just a few days in Kyoto, it’s easy to get overwhelmed. But don’t worry! You’ve got just enough time to savor everything before heading towards your next destination—Osaka awaits!
Day 10: Nara in a Day (Todaiji, Nara Park)
What comes next is a hidden gem in your 2 week Japan itinerary. Nara, with its rich history and stunning parks, offers an unforgettable experience in just one day. After soaking in the highlights of Kyoto, it’s time to switch gears and head to Nara Park and Todaiji Temple.
Nara is famous for its free-roaming deer and historical significance, making it a unique stop. You'll want to start your day early. The journey from Kyoto takes just about 45 minutes by train. Trust me, catching those first rays of sun over the park is worth it.
Once you arrive, your first stop should be Todaiji Temple, home to one of the largest bronze Buddha statues in Japan. This breathtaking structure will leave you speechless. When I visited, standing in that massive hall surrounded by intricate carvings was a highlight I won’t forget.
After exploring Todaiji, take a stroll through Nara Park. This sprawling space is not only beautiful but also filled with friendly deer who aren’t shy about approaching you for snacks (just make sure you buy some special deer crackers from local vendors!). Spending time here feels like stepping back in time; ancient trees and the gentle presence of wildlife create a serene atmosphere.
- Tip: Don't miss the nearby Kasuga-taisha Shrine. It's a bit of a walk but well worth it for its iconic lanterns.
- Lunch Break: Try local specialties like kakinoha-zushi (pressed sushi wrapped in persimmon leaves) at one of the eateries near the park.
- Timing: Aim to spend at least 3-4 hours here to truly soak in the sights without feeling rushed.
The beauty of this day trip lies in its balance between historical significance and natural beauty. In my experience, dedicating a full day allows you to explore at your own pace while savoring each moment. Plus, it's an easy escape from city life, allowing for deeper reflection on Japan's cultural roots.
This unique combination of nature and history provides a fantastic wrap-up before you head back towards Osaka or continue your adventures elsewhere. As you prepare for the next leg of your journey—whether it's diving into bustling Osaka or enjoying the tranquility of more temples—keep this day fresh in your mind as a reminder of what makes Japan so special.
Day 11–12: Osaka Food & Nightlife (Dotonbori, Umeda)
This is where it gets serious. After soaking in the tranquil beauty of Nara and the cultural richness of Kyoto, you’re ready for the vibrant pulse of Osaka. Known as Japan’s kitchen, Osaka promises an unforgettable dive into its culinary scene and nightlife, especially around Dotonbori and Umeda.
When you step into Dotonbori, get ready for a sensory overload. The neon lights flickering overhead and the aroma of street food wafting through the air set the perfect backdrop for an exciting evening. Don’t miss trying takoyaki (octopus balls) and okonomiyaki (savory pancakes). My personal favorite? A little hole-in-the-wall spot tucked away from the main tourist area, where they serve their okonomiyaki with a secret sauce that absolutely elevates the dish. Trust me, it’s worth hunting down!
As night falls, take a stroll along the canal while watching street performers entertain crowds. The atmosphere is electric, and everyone is there to enjoy life. You’ll find everything from lively bars to karaoke joints—this is where locals come to unwind after a long day.
If you’re looking for something a bit more upscale, head towards Umeda. Here, you can visit high-end restaurants offering multi-course kaiseki dining experiences or grab drinks at rooftop bars with stunning views of Osaka's skyline. In my experience, finding a spot that overlooks the city at night is essential—it adds a whole new layer to your evening.
Additionally, consider visiting the Umeda Sky Building. Not only does it offer breathtaking views, but it's also a great way to see how modern architecture blends with traditional Japanese aesthetics. And if you're looking for some late-night shopping or unique souvenirs, check out Grand Front Osaka, which features numerous shops and cafes.
The blend of flavors and experiences in Osaka will be memorable. So pack your appetite—this is just the beginning of your culinary adventure! As you prepare to wrap up these two action-packed days in Osaka, keep in mind that your next stop awaits: journeying deeper into Japan's rich history.
Day 13: Hiroshima & Miyajima (Peace Park, Itsukushima Shrine)
What makes Day 13: Hiroshima & Miyajima (Peace Park, Itsukushima Shrine) so significant? It’s where history and beauty collide. After the vibrant streets of Osaka and the cultural treasures of Nara, this day takes you deep into Japan’s past and stunning landscapes.
Your journey begins at the Hiroshima Peace Memorial Park. This site is not just about remembrance; it's a powerful testament to resilience. Standing near the Atomic Bomb Dome, you can almost feel the weight of history surrounding you. I remember my first visit; it hit me how one moment can change everything. Take time to explore the museum too—it's gut-wrenching yet essential.
Plan to spend at least two hours here. You’ll want to absorb everything—the stories, the artifacts, the feeling of hope amidst despair. Make sure to grab a map at the entrance; it will guide you through key points of interest, including memorials for victims that highlight personal stories rather than just statistics.
After soaking in Hiroshima’s poignant history, hop on a ferry to Miyajima Island. This is where the Itsukushima Shrine awaits you, famous for its floating torii gate that seems to rise out of the sea during high tide. The sight is unforgettable—one of those iconic images that makes travel worthwhile. I’ve seen countless photos of it, but standing there in person was surreal.
- The shrine is an easy 10-minute walk from the ferry terminal.
- Don’t miss trying momiji manju, a maple leaf-shaped cake filled with sweet red bean paste—absolutely delicious!
- If time allows, hike up Mount Misen for panoramic views; it’s about an hour’s trek but worth every step.
This combination of historical gravity and natural beauty is what makes Day 13 truly unique. As you leave Miyajima, take a moment to reflect on how these experiences shape your understanding of Japan. With every step closer to your next destination, you’ll carry these memories with you.
Now that you've connected with Japan’s heart through its past and present, get ready for your next adventure as we head into Day 14: a dive back into modernity in Osaka! What surprises await there?
Day 14: Return to Tokyo & Last-Minute Shopping
It’s hard to believe that your 2 week Japan itinerary is coming to a close, but here we are at Day 14: Return to Tokyo & Last-Minute Shopping. After all the excitement in Nara, Osaka, and Hiroshima, you’re back in the buzzing capital ready to snag those final souvenirs and enjoy a bit of urban exploration.
When returning to Tokyo, make sure to use your Japan Rail Pass if you have it; it makes the trip smooth and affordable. You’ll probably find yourself reminiscing about everything you’ve seen and done. But don’t let nostalgia slow you down; there’s much left to experience!
One of my favorite spots for last-minute shopping is Shibuya. The energy here is contagious! You can hit up stores like Loft and Tokyu Hands for quirky gifts that scream “Japan.” If you're a fan of fashion, check out Shibuya 109—it’s packed with trendy boutiques catering to all styles.
If you’ve got a specific shopping list—think traditional crafts, anime merchandise, or even high-tech gadgets—head over to Akihabara. Trust me, this place is a treasure trove for otaku culture lovers. Just remember that some shops may offer discounts if you show your passport!
- Timing is key: Most shops open around 10 AM and close by 9 PM. Plan accordingly.
- Cash is king: While many places accept credit cards, having yen on hand can save you some hassle.
- Don’t rush: Take time to enjoy your last meal in Japan—perhaps at one of the famous conveyor belt sushi places?
I always recommend keeping an eye on your shopping bags—Tokyo's public transport can get crowded! Carrying multiple bags might make navigating trains a bit challenging.
The vibe in Tokyo can change dramatically from day to night. So if time allows, stick around after dark; the city lights up beautifully. Plus, grabbing a final evening drink at a rooftop bar with a view of the skyline is the perfect way to wrap up your adventure.
This day isn’t just about shopping; it’s about soaking in every moment before heading home. Tomorrow will lead you toward departure preparations, so take a breath and enjoy Tokyo one last time.
Alternatives & Seasonal Swaps (Choose Your Own Adventure)
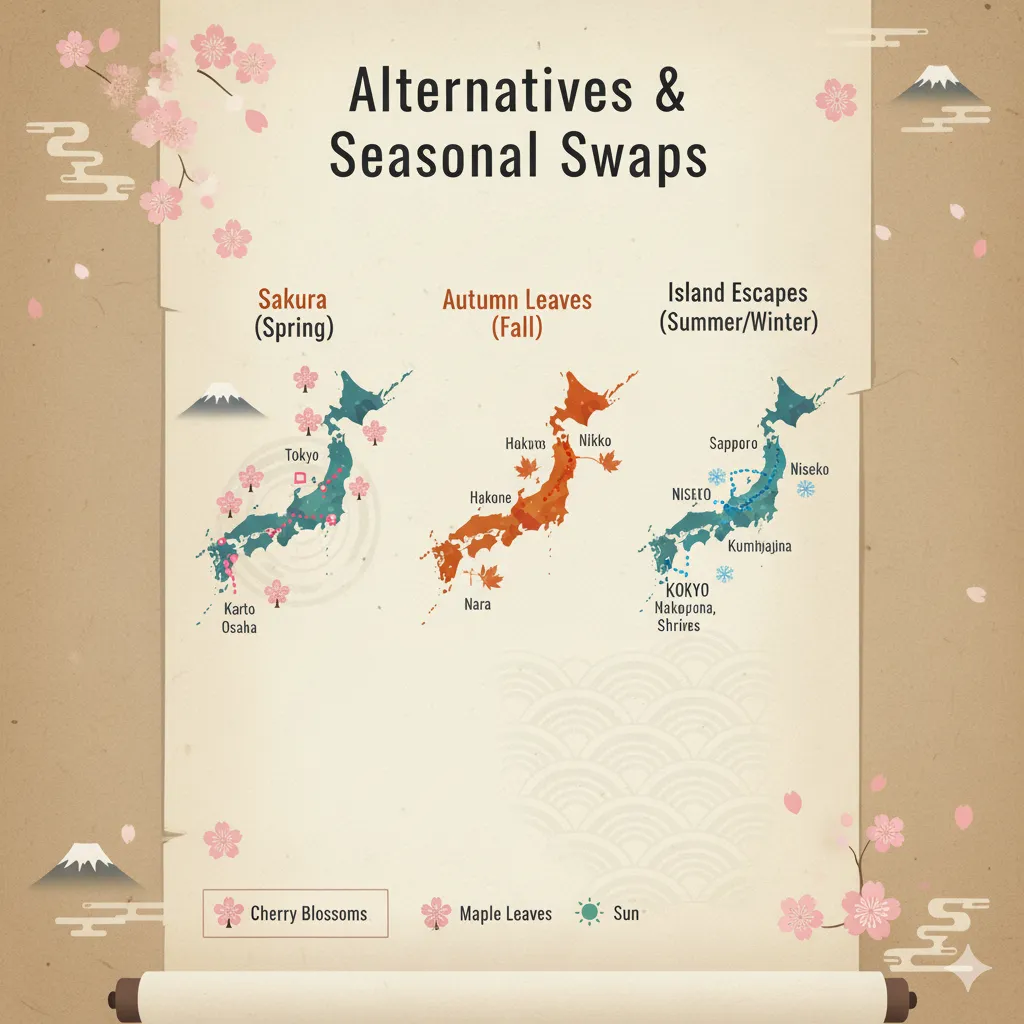
Now, the tricky part. Your two-week Japan itinerary is not set in stone. The beauty of traveling in Japan is that you can swap destinations and experiences based on the season or personal preference. Imagine wanting to dive deeper into Japanese culture or nature instead of just ticking boxes on a checklist.
For instance, if you’re visiting in spring, you might want to substitute a day in Kyoto with a trip to Takayama for its stunning cherry blossoms and local festivals. It's a small city that feels like stepping back in time, famous for its well-preserved Edo-period buildings and serene atmosphere. I remember my visit there; the sakura was breathtaking and so different from the hustle of Tokyo.
Likewise, if you're in Japan during autumn, consider swapping out Hiroshima for Nikko. This UNESCO World Heritage site is a feast for the eyes with its vibrant fall colors framing ornate temples like Toshogu Shrine. It’s about a two-hour train ride from Tokyo and offers an entirely different vibe that’s peaceful yet deeply historical. Trust me, spending a day surrounded by nature and history can be refreshing.
- Spring Swap: Kyoto for Takayama — experience cherry blossoms and traditional architecture.
- Autumn Adventure: Hiroshima for Nikko — enjoy stunning fall foliage and tranquil temples.
- Winter Wonderland: Sapporo — indulge in winter sports and the famous Sapporo Snow Festival.
- Summer Escape: Nara over Osaka — beat the heat with leisurely walks among friendly deer.
In my experience, embracing these alternatives can make your 14 days in Japan more memorable than just following a strict itinerary. Every destination has its unique charm that can enrich your travel story.
The key here is flexibility. You don't have to follow every suggestion; choose what resonates with you. If you're someone who loves food, lean into those culinary experiences like street food tours or seasonal markets that pop up throughout the year. If history fascinates you, prioritize those sites that spark your interest rather than sticking solely to popular destinations.
This adaptability not only enhances your trip but often leads to unexpected adventures and interactions with locals that you'll treasure long after you've returned home. And just like that, we transition smoothly into Day 15: Reflecting on your journey and planning how to take these experiences back home with you.
Sakura Edition (Move North for Later Blooms)
When we talk about Sakura Edition (Move North for Later Blooms), one detail stands out: timing. It’s not just about where to go but when. If you want to experience cherry blossoms at their peak, being strategic with your itinerary can make all the difference.
After soaking in the history of Hiroshima and Miyajima, it's time to think ahead. Late March to early April is prime sakura season in places like Tokyo and Kyoto. But if you plan to extend your trip northwards, you'll catch the blooms later in cities like Sendai or Aomori. This way, you can effectively enjoy two different stages of the cherry blossom season.
For example, during a recent trip, I started in Tokyo around late March. By April 5th, I was on a train heading to Sendai. Guess what? The sakura there was still stunning—at its peak! This strategy allowed me to enjoy the blossoms longer than my friends who stuck around Tokyo only.
Here are a few tips for your own Sakura Edition:
- Plan your dates: Look up blooming forecasts for each city as they change yearly.
- Book in advance: Train tickets and accommodations get booked fast during sakura season.
- Explore parks: Places like Shinjuku Gyoen in Tokyo or Maruyama Park in Kyoto offer iconic views.
- Cultural experiences: Participate in hanami (flower viewing) picnics to soak up local culture while enjoying the blooms.
- Stay flexible: Weather can impact bloom times; having flexibility in your plans helps.
The key here is embracing adaptability. You’re not just traveling through Japan; you're experiencing it in an immersive way that enriches your journey. And as you prepare for your next adventure, keep this mindset: don't rush through your itinerary. Instead, savor each moment and bloom.
This leads us nicely into our next section where we'll discuss how to maximize shopping opportunities before wrapping up your unforgettable two-week adventure through Japan.
Autumn Foliage Route (Kyoto Peaks + Nikko)
This is where it gets exciting. When you think of the Autumn Foliage Route, a vibrant tapestry of reds and oranges is likely what comes to mind. Combining the stunning peaks of Kyoto with the serene landscapes of Nikko creates an unforgettable experience that you shouldn’t miss.
Imagine standing under a canopy of fiery leaves in Kyoto's Arashiyama Bamboo Grove or hiking up to Kiyomizu-dera as the sun sets, casting a golden glow on those brilliant hues. To make the most of this journey, planning your route is essential. You’ll want to hit Kyoto first, then make your way to Nikko, ensuring you're in the right place at just the right time for that peak foliage.
In my experience, timing is everything. The best weeks for viewing autumn colors in Kyoto typically fall between late October and mid-November. While in Nikko, expect the colors to peak slightly later, around early November to mid-November. Here’s a quick win: check out local forecasts or websites like Klook that update leaf-peeping dates frequently for both locations.
- Start in Kyoto: Arrive early and explore popular spots like Kinkaku-ji (the Golden Pavilion) and Tofuku-ji Temple.
- Nikko Next: Take a train from Tokyo; it’s about two hours long. The trip itself offers fantastic views!
- Befriend locals: Chat with vendors or locals; they know secret spots away from tourist traps where you can see breathtaking foliage.
- Pack for hikes: Comfortable shoes are key; you'll be doing some walking at both locations!
- Photograph wisely: Try to capture sunrise or sunset; that's when colors pop most dramatically.
The scenery will have you reaching for your camera more than once. I’ve seen friends who had never picked up a camera suddenly become budding photographers just from witnessing such beauty! This autumn foliage route isn't just about viewing leaves; it's about experiencing Japan's seasonal charm at its fullest.
So pack your bags and get ready for a visual feast. You'll transition seamlessly from seeing Kyoto's ancient temples wrapped in autumnal hues to exploring Nikko’s natural wonders, perfectly setting you up for your next adventure, whether that's diving into shopping in Tokyo or simply enjoying a quiet moment reflecting on your journey.
Anime & Pop-Culture Track (Ghibli, Akihabara, TeamLabs)
When we talk about the Anime & Pop-Culture Track (Ghibli, Akihabara, TeamLabs), one detail stands out: it’s a unique blend of art, technology, and nostalgia that captivates both locals and tourists alike. This is not just a fun sidetrack; it’s an essential experience for anyone diving into Japan’s cultural landscape.
First up, let’s hit Ghibli Museum. If you’re a fan of Studio Ghibli films like "My Neighbor Totoro" or "Spirited Away," this place is a must. The museum offers a glimpse into the magical worlds created by Hayao Miyazaki and his team. Pro tip: buy your tickets online well in advance. They tend to sell out quickly—like, within hours. I once waited too long and missed out; don't make the same mistake!
Next on the agenda: Akihabara, the heart of otaku culture. Here, you'll find endless shops filled with anime merchandise, games, and themed cafés. One afternoon spent wandering through these vibrant streets can lead to discovering everything from retro video games to the latest collectibles. Plus, don’t miss the chance to try a maid café for a unique dining experience—it's as entertaining as it is delicious.
And then there’s TeamLab Borderless, an immersive digital art museum in Tokyo that has redefined modern art experiences. Picture this: you step into a room where flowers bloom around you as you walk through them. It's mesmerizing! This place uses advanced technology to create interactive environments that change with your movements. Plan to spend at least 2-3 hours here; I guarantee you’ll leave with more than just photos; it’ll spark your imagination.
The beauty of integrating these locations into your 2-week Japan itinerary is that they each offer something distinct yet interconnected. They reflect the creativity that pulses through Japanese culture today while allowing you to connect deeply with its past.
So, while you're planning your travels through Japan, remember this track is not just about visiting places; it's about diving into experiences that will stay with you long after you've returned home. And speaking of journeys, let’s shift gears toward exploring some beautiful local flavors in our next section.
Hokkaido Summer Loop (Sapporo–Furano–Biei) [Optional]
Many travelers often overlook the magic of Hokkaido during summer, but this is where you can unlock some incredible scenery and experiences. The Hokkaido Summer Loop connecting Sapporo, Furano, and Biei is a hidden gem that allows you to embrace the vibrant greens and colorful blooms of Japan's northernmost island.
Picture this: You start in Sapporo, a city rich in culture and delicious food. From there, it's only about 1.5 hours to Furano, famous for its lavender fields and rolling hills. If you're a fan of nature or photography, you can't miss the breathtaking views of the colorful flower farms that explode into life during July. Personally, I've found that standing among the rows of lavender at Farm Tomita feels like stepping into a painting.
Next up is Biei, just a short hop from Furano. This quaint town is known for its beautiful landscapes dotted with picturesque farms and gently undulating hills. One of my favorite spots is the Blue Pond (Aoiike), which has an otherworldly hue that changes with the light. Trust me; your Instagram feed will thank you!
- Sapporo: Try local specialties like miso ramen.
- Furano: Visit during mid-July for peak lavender season.
- Biei: Rent a bike to explore scenic routes at your own pace.
The beauty of this loop lies in its accessibility and the diversity of experiences it offers. Whether you’re hiking in Furano or enjoying fresh dairy products from local farms in Biei, there’s something for everyone. Just keep in mind: getting around might require renting a car or using local buses since public transport options are limited compared to urban areas.
If you’ve been following along with our journey through Japan's seasonal offerings, this loop serves as an amazing addition to your itinerary—especially if you're considering a two-week trip in Japan that includes some off-the-beaten-path adventures. It complements perfectly with the cherry blossoms from the Sakura Edition or the vibrant autumn hues discussed earlier.
The Hokkaido Summer Loop offers a refreshing contrast to more urban experiences while still being comfortably manageable. So pack your camera and get ready for an unforgettable journey through Japan’s natural beauty!
Kyushu Highlights in 3–4 Days (Fukuoka–Beppu–Nagasaki) [Optional]
Let’s zoom into what matters. If you’re looking for a quick getaway in Japan, the highlights of Kyushu in 3 to 4 days—Fukuoka, Beppu, and Nagasaki—offer a compact but rich experience that’s hard to beat.
Start your journey in Fukuoka, known for its vibrant street food scene. Head to Nakasu, where you can grab a bowl of tonkotsu ramen from one of the many yatai (street stalls) lining the streets. In my experience, trying food from these stalls not only fills your stomach but also immerses you in the local culture. Spend your afternoon exploring Ohori Park or visit Fukuoka Castle ruins for a bit of history.
The next day, take a train to Beppu, famous for its onsen (hot springs). It's about a 2-hour ride. Don't miss the "Hells of Beppu," unique hot springs that are more about visuals than bathing. You can see bubbling mud pools and colorful waters, which are stunning but not for swimming. Afterward, treat yourself to a soak at an actual onsen; the rejuvenation is worth every yen!
Finally, make your way to Nagasaki, roughly 3 hours from Beppu. This city is steeped in history, especially related to its role as one of the few ports open to foreign trade during Japan's isolation period. Visit the Peace Park and the Atomic Bomb Museum to gain insight into its poignant past. The view from Glover Garden at sunset is breathtaking—perfect for some memorable photos.
- Food experiences: Dive into local cuisine at street stalls in Fukuoka.
- Relaxation: Experience the healing properties of Beppu's hot springs.
- Cultural immersion: Understand Nagasaki's unique history and scenic beauty.
With this itinerary, you can appreciate Kyushu’s essence without feeling rushed. Ojo con esto: planning ahead will help you maximize every moment! Each stop offers something unique, making your journey genuinely memorable as part of your two-week Japan itinerary.
Where to Stay (By City & Neighborhood)
Let’s zoom into what matters. Choosing the right place to stay can make or break your trip. It's not just about finding a bed; it's about immersing yourself in the culture, convenience, and vibe of each city and neighborhood you visit.
In Tokyo, for instance, staying in Shinjuku gives you quick access to nightlife and shopping, plus it’s a major transportation hub. You’ll be close to everything and can take late-night trains back without much hassle. I once stayed in a tiny but cozy capsule hotel there; it was fascinating! But if you’re after a quieter experience, consider Asakusa, where you can enjoy more traditional vibes and see the Senso-ji Temple up close.
Now, let’s talk Kyoto. This city is all about history and serenity. If you're looking to dive deep into its temples and gardens, neighborhoods like Gion or Pontocho offer a wonderful backdrop. I remember wandering those lantern-lit streets at dusk, feeling like I'd stepped into another era. For those who prefer modern conveniences with easy access to sights, look at Kawaramachi. It has great restaurants and shops right at your doorstep.
Heading down south to Osaka? Don’t miss Namba. This area is famous for street food—think takoyaki and okonomiyaki—as well as vibrant nightlife. It’s like the heart of Osaka’s energy! On the flip side, if you crave something calmer, try Umeda. It has great shopping malls and some stunning architecture without the overwhelming buzz of Namba.
When choosing accommodations, don’t overlook price versus value. There are countless options from hostels to luxury hotels tailored for every budget. In my experience, mid-range hotels often provide the best balance: they’re affordable yet offer comfort that makes your stay enjoyable.
If you're planning a two-week Japan itinerary or even just 14 days in Japan, your choice of neighborhoods should align with what you want to experience. Make sure each city visit complements the next while considering travel times between them—nobody wants a two-hour commute after a long day exploring.
The key here is flexibility. Adjust your lodging based on activities planned for each day—you might want different bases depending on whether you're hiking in Hokkaido or exploring urban landscapes in Tokyo. Each neighborhood has its unique charm that contributes to your overall journey.
This journey through accommodation options sets the stage for diving deeper into cultural experiences that await you across Japan's vibrant cities. Ready for that next adventure? Keep following along as we explore the must-see attractions!
Tokyo: Shinjuku vs. Ginza vs. Asakusa (Pros/Cons)
So, you're diving into Tokyo’s neighborhoods. Shinjuku, Ginza, and Asakusa each offer a unique slice of this vibrant city. What’s the real deal? Let’s break it down to help you decide where to plant your feet.
Shinjuku is a bustling hub known for its nightlife and entertainment. You’ve got towering skyscrapers, neon lights, and a major train station that can feel like a labyrinth (trust me, I’ve lost my way more than once). On the plus side, it’s a great area for shopping and dining options galore. However, it can be overwhelming—think crowds and noise all around. If you're looking for excitement, Shinjuku's your spot.
Then there’s Ginza, Tokyo's upscale shopping district. High-end boutiques and luxury brands line the streets here. It feels refined and posh—perfect if you're up for some serious retail therapy or fine dining experiences. Yet, here's the kicker: it's pretty expensive compared to other areas in Tokyo. If your budget's tight, Ginza might make you cringe as you eye those designer prices.
And let’s not forget about Asakusa. This area brings you closer to traditional Japan with Senso-ji Temple as its crown jewel. Walking through Nakamise Street is like stepping back in time—snack on melon bread while browsing souvenir shops! The vibe is more laid-back compared to the frenetic energy of Shinjuku or the luxury of Ginza. But be warned: Asakusa can get touristy during peak seasons, so plan accordingly if you want to avoid the crowds.
- Shinjuku Pros: Vibrant nightlife and diverse dining options; great for entertainment enthusiasts.
- Shinjuku Cons: Crowds can be overwhelming; not ideal for those seeking tranquility.
- Ginza Pros: Upscale shopping and elegant atmosphere; perfect for splurging.
- Ginza Cons: Higher prices may deter budget travelers; less cultural authenticity.
- Asakusa Pros: Rich in culture with historical sites; offers a traditional Japanese experience.
- Asakusa Cons: Can be overly crowded during tourist season; less dynamic nightlife.
No matter where you land in Tokyo, each neighborhood has something special to offer. Choose based on what sparks your interest—whether it's history in Asakusa or late-night adventures in Shinjuku—and don't hesitate to mix it up! Now that you've got the lowdown on these areas, let’s explore how to navigate Tokyo efficiently in our next section.
Kyoto: Gion vs. Kyoto Station vs. Arashiyama
Watch this nuance. When exploring Kyoto, you’ll often hear about the distinct vibes of Gion, Kyoto Station, and Arashiyama. Each area offers a different slice of Kyoto's rich tapestry, but which one is right for you?
Gion is like stepping into a time machine. Here, the streets are lined with traditional wooden machiya houses and teahouses. If you're lucky, you might spot a geisha gracefully making her way to an appointment. I remember my first evening stroll through Gion; it felt surreal, almost cinematic. The energy shifts dramatically in the evening with lanterns lighting up the narrow lanes. If you’re after authentic Japanese culture and perhaps a glimpse of an old-world lifestyle, Gion is your go-to.
Then there's Kyoto Station—it's not just a transport hub; it's a vibrant center packed with shopping, dining, and architecture that can easily take your breath away. This modern marvel contrasts sharply with the historical sites in Gion. I was amazed by the panoramic views from its rooftop garden on the 10th floor—an unexpected escape from the urban hustle. It’s an excellent base for day trips if you're planning a two-week itinerary in Japan.
Arashiyama steals the show with its stunning natural beauty. Imagine walking through the iconic Bamboo Grove or enjoying the serene view of the Togetsukyo Bridge across the river. You can even hop on a boat tour to see cherry blossoms if you're lucky enough to visit in spring. In my experience, visiting Arashiyama early in the morning allows you to enjoy its tranquility before crowds arrive.
- Gion: Traditional culture and geisha sightings.
- Kyoto Station: Modern amenities with great connectivity.
- Arashiyama: Nature-focused activities and scenic beauty.
The key here is to consider what you're most interested in experiencing during your stay in Kyoto. Whether it’s cultural immersion in Gion, urban exploration at Kyoto Station, or nature adventures in Arashiyama, each location has something unique to offer.
This diversity makes Kyoto an exciting destination within your two-week Japan itinerary. And speaking of excitement, let's dive into where you should stay for the best experience in this remarkable city!
Osaka: Namba vs. Umeda
Let’s zoom into what matters when you're choosing your base in Osaka: Namba vs. Umeda. These two districts offer unique vibes and access to different attractions, making them pivotal to your experience. While they might seem similar at first glance, the choice between them could shape your trip significantly.
Namba is renowned for its bustling atmosphere. If you thrive on energy, this is where you want to be. Street food stalls, the famous Dotonbori canal, and vibrant nightlife await you. Plus, it's a hub for shopping and entertainment with places like Namba Parks and Shinsaibashi Shopping Arcade. From personal experience, staying in Namba allows for spontaneous late-night ramen runs—one of my favorite aspects of traveling in Japan!
On the flip side, we have Umeda. This area is slightly more sophisticated and less chaotic than Namba, making it perfect for those who prefer a calmer environment but still want easy access to amenities. With landmarks like the Umeda Sky Building offering stunning city views and a plethora of department stores, Umeda caters well to travelers looking for comfort and style. The JR Osaka Station connects you directly to various shinkansen lines—ideal if your 2 week Japan itinerary includes trips to Kyoto or Tokyo.
- Transportation: Namba is closer to the subway, while Umeda is better connected by JR trains.
- Dining: For street food and local eats, Namba has the upper hand.
- Shopping: Umeda shines with high-end department stores.
Ojo con esto: both areas are well-connected via public transport; however, if you're planning day trips across Kansai (like Himeji or Kobe), Umeda could save you time.
Your choice ultimately hinges on what you value more: the pulse of nightlife and dining in Namba or the convenience and comfort of Umeda. Either way, you'll have access to an unforgettable Osaka experience.
Now that you've got a clearer picture of Osaka's districts, let’s move forward into planning your itinerary for exploring this vibrant city while balancing it with your adventures in Kyoto and Tokyo.
Hakone & Onsen Picks (Ryokan Basics)
Let’s zoom into what matters. Hakone is often a top pick for travelers seeking a traditional Japanese experience, especially when it comes to onsen (hot springs) and ryokan (traditional inns). The beauty of this region isn’t just its stunning views but also the opportunity to unwind in its famous hot springs.
When choosing a ryokan in Hakone, consider your priorities. Do you want an authentic experience with kaiseki meals? Or perhaps a ryokan with private onsen? My personal favorite is Yoshimatsu, which offers breathtaking views and delicious multi-course dinners. Guests here rave about the serene atmosphere, and I can vouch that soaking in their outdoor onsen while watching the sunset is life-changing.
It’s crucial to book early. Popular ryokan can fill up weeks or even months ahead, especially during peak seasons like cherry blossom and autumn foliage times. If you’re traveling during these periods, try to secure your spot at least two months in advance.
- Kaiseki Experience: Many ryokan serve traditional multi-course meals, so research options beforehand if food is your focus.
- Public vs. Private Onsen: Decide if you'd rather share the experience or enjoy privacy; both have unique vibes.
- Location: Consider being close to transport links, making it easier to explore other parts of Hakone.
The onsen culture here is rich, with various types of mineral baths believed to have healing properties. You might come across sulfurous waters or iron-rich baths; each offers different benefits. I recommend trying several types if you can!
This isn’t just about soaking; it's about the overall experience of relaxation and connection with nature. Remember that it's customary to wash before entering the bath, so don't skip that step—it's part of the etiquette.
Ojo con esto: a visit to Hakone isn’t complete without trying the local specialty—black eggs boiled in the hot springs! Legend has it that eating one adds seven years to your life.
As we wrap up this section on Hakone and its ryokan picks, keep those essentials in mind as you plan your two-week Japan itinerary. Next up, we’ll dive deeper into what makes Kyoto's cultural heart beat strong.
Hiroshima/Miyajima: Stay Split Advice
What almost nobody tells you is that splitting your stay between Hiroshima and Miyajima can be a game changer. This clever trick not only saves you time but also allows you to immerse yourself more deeply in the unique cultures of both places. Let's break down how to make the most of this combo.
Start with Hiroshima. It’s vital to allocate at least two full days here, especially if you're keen on visiting the Hiroshima Peace Memorial Park and Museum. The tragic history is an essential part of the city’s identity, and spending time here will leave a lasting impression. On your second day, consider taking a stroll through the bustling shopping districts or enjoying some local okonomiyaki—trust me, it's delicious! In my experience, indulging in Hiroshima's culinary delights is as important as its history.
Now, here comes the magic: make sure to dedicate a day trip to Miyajima. Just a short ferry ride from Hiroshima, this island is home to the iconic floating torii gate. Plan your visit early in the day to beat the crowds; you'll want those pristine photos without too many tourists in the background. A mini-case from my travels: I arrived at Miyajima just as the tide was low, allowing me to walk right up to the gate—an unforgettable experience!
- Timing is key: Visit Miyajima on a weekday if possible.
- Get an early start: The ferries run frequently, but arriving early gives you more time.
- Stay overnight: Consider spending one night on Miyajima for an even more peaceful experience.
- Cultural immersion: Try to catch a traditional performance or visit a shrine while you're there.
The distance between both locations makes traveling back and forth cumbersome if done incorrectly. Many travelers make the mistake of treating them as separate trips. By splitting your stay wisely between Hiroshima and Miyajima, you maximize your exploration time while minimizing travel stress.
This approach flows smoothly into your next travel plans; as you contemplate moving toward other destinations like Osaka or Kyoto, remember: it’s all about strategic planning. Enjoying these stunning sites with thoughtful timing can truly enrich your overall Japanese journey.
Getting Around Japan (JR Pass, IC Cards & Apps)
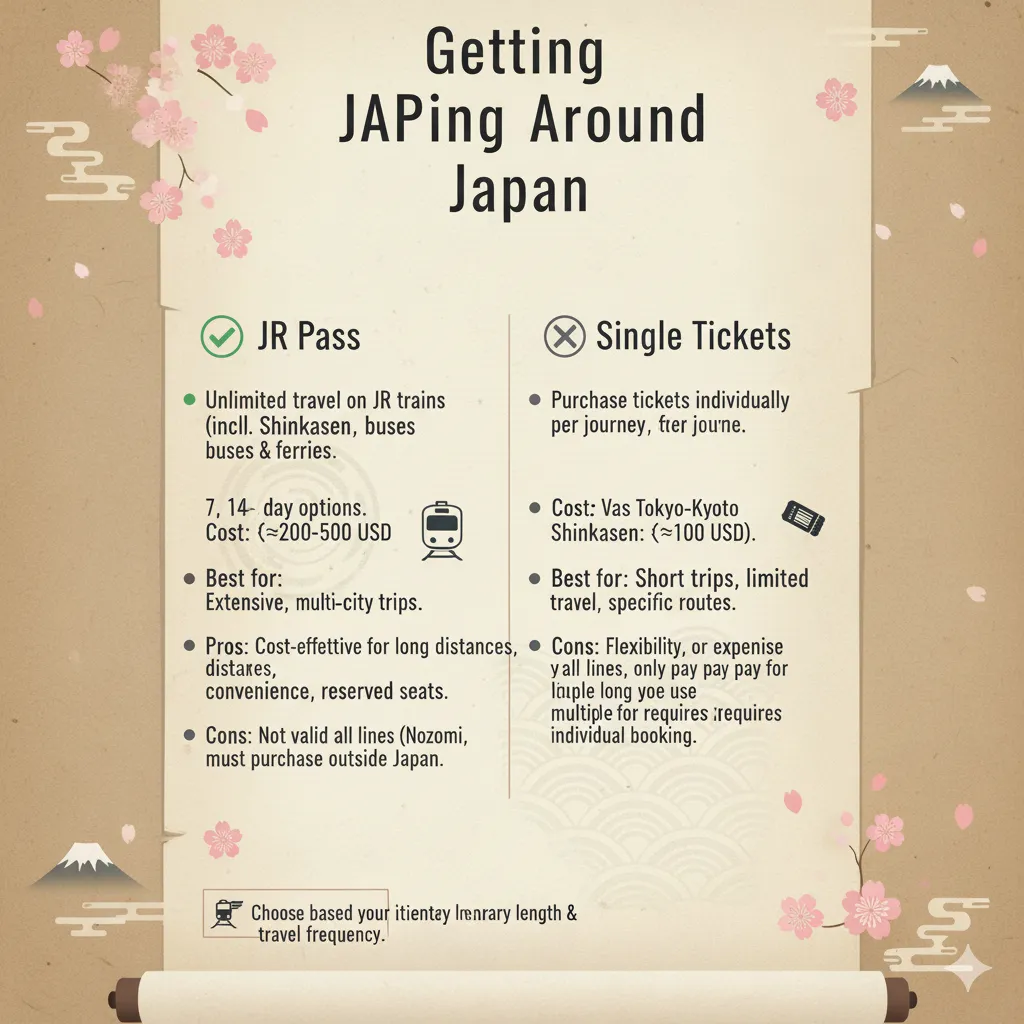
Let’s break it down. Navigating Japan can feel overwhelming, especially when you consider the vast network of trains and buses. But with the right tools—like the JR Pass, IC cards, and useful apps—you’ll find yourself moving through the country like a local.
The JR Pass is a game-changer for travelers planning to visit multiple cities. This pass allows unlimited travel on most of Japan's trains for a set period (7, 14, or 21 days). If you’re on a 2 week Japan itinerary, this can save you serious cash. For example, a round trip from Tokyo to Kyoto typically costs about $280. The JR Pass? Only around $420 for 14 days. Just make sure to plan your trips wisely to maximize its value!
I remember my first time using the JR Pass. I was skeptical at first; could it really be worth it? After two trips to Kyoto and one to Hiroshima within a week, I realized it was not just convenient but also economical. Plus, hopping on a Shinkansen (bullet train) is an experience in itself!
Then we have IC cards, which are perfect for city travel. Cards like Suica or Pasmo can be used across various public transport systems in cities like Tokyo and Osaka. Simply load them with money, tap at ticket gates, and you're golden. No need to fuss with buying individual tickets every time you ride—definitely a time-saver!
Apps are equally crucial in making your journey smoother. Download Hyperdia or Google Maps for real-time transit information and schedules. These apps help you avoid common pitfalls like taking the wrong train or missing transfers. Did you know that about 60% of travelers who rely solely on maps end up confused at least once? The right app makes all the difference.
- JR Pass: Best for long-distance travel; buy online beforehand.
- IC Cards: Perfect for city commuting; top them off as needed.
- Transit Apps: Essential for navigation; Hyperdia is my go-to.
Ojo con esto: consider where you're going when deciding between the JR Pass and an IC card; sometimes it’s worth combining both based on your travel plans.
This practical toolkit will enhance your journey across Japan significantly. And as we move into our next adventure—exploring cultural experiences—you’ll see how mastering transport opens up even more opportunities for unforgettable memories.
Is the 14-Day JR Pass Worth It for This Itinerary?
Before we dive into whether the 14-day JR Pass is worth it for this itinerary, let’s establish some key points. Many travelers are torn between purchasing a pass or paying for individual tickets. It's a common debate, especially when considering a two-week Japan itinerary.
The JR Pass can be a real game-changer, but its value hinges on your travel plans. For example, if you're visiting major cities like Tokyo, Kyoto, and Osaka, and plan to take the Shinkansen (bullet train) between them, the pass might save you quite a bit. A round trip between Tokyo and Kyoto alone costs around $280—almost the price of a 7-day pass!
On the other hand, if your itinerary includes areas not covered by JR lines or if you plan to stay in one city longer than traveling across them, buying individual tickets could be more economical. I’ve seen many first-time travelers underestimate how often they’ll use the train versus staying local in one region.
Let's break it down with an example: Say you want to visit five major spots in two weeks: Tokyo, Hakone (for that onsen experience), Kyoto, Hiroshima/Miyajima, and Osaka. Here's what your travel costs could look like:
- Tokyo to Hakone: ~$40
- Hakone to Kyoto: ~$50
- Kyoto to Hiroshima: ~$60
- Hiroshima to Osaka: ~$50
- Osaka back to Tokyo: ~$80
If you add these up, you’re looking at approximately $280 just for these segments. With a JR Pass priced around $400 for 14 days, you'd still have the freedom to explore other regions without stressing over ticket costs.
The practical key here is understanding your travel habits. If you enjoy exploring multiple cities without getting tied down by logistics, then the JR Pass could be worth it for this itinerary. But if you're more inclined toward deep dives in fewer places (like spending extra time in Kyoto), then consider sticking with single fare tickets.
No matter which option you choose, the right planning makes all the difference in having an unforgettable trip. And remember: it’s not just about how much you spend; it’s about what experiences you gain along the way! Now that we've tackled transportation costs, let's move on to some accommodation tips that will enhance your stay while navigating Japan.
Shinkansen 101: How to Reserve, Luggage Rules
Watch this nuance. When it comes to navigating Japan's Shinkansen system, understanding how to reserve tickets and the luggage rules can make all the difference in your travel experience. If you’ve been following along, you know that getting around Japan smoothly is key to enjoying your 2 week Japan itinerary.
First off, let’s tackle the reservation process. You can book your Shinkansen tickets online or at ticket offices in train stations. For a first-timer, I recommend using the JR East website or the SmartEX app for hassle-free reservations. It's as straightforward as entering your departure and arrival stations, selecting your travel date, and picking your preferred seat type. For instance, if you're traveling from Tokyo to Kyoto, a reserved seat costs around ¥14,000 ($130), while unreserved seats can be about ¥13,000 ($120). I've seen too many people miss out on great seats because they thought they could wing it—don’t let that be you!
Now, onto luggage rules—this is where things can get tricky. The Shinkansen has specific guidelines regarding baggage to make travel smoother for everyone. Each passenger is allowed one piece of luggage up to 160 cm (total dimensions) and a smaller carry-on bag. If you're planning on bringing more than that (or larger items like strollers), you’ll need to book a special space called “tokubetsu sharyo.” Keep in mind that these spaces are limited; it's wise to reserve them in advance.
In my experience, using packing cubes not only saves space but also makes it easier to manage your belongings on the go. You'll thank yourself later when trying to shuffle through the aisles with a crowd around!
Another handy tip: if you plan on bringing sports equipment or larger bags, check with the specific Shinkansen line beforehand for any potential fees or restrictions. Some travelers I know faced unexpected issues simply because they didn’t ask ahead of time.
As we move forward into finding value within your 14 days in Japan, keep these Shinkansen tips handy. They’ll serve you well not just for comfort but also for making better use of your itinerary.
Suica/PASMO/ICOCA: When to Use IC Cards
Let’s dive into the practical side of getting around with Suica, PASMO, and ICOCA. These IC cards simplify travel in Japan, especially when you’re hopping between major cities on your two-week itinerary. But knowing when to use each card can save you a good chunk of time and frustration.
First up, understand that all three cards serve similar purposes: they allow for convenient travel on trains, buses, and even at select vending machines or convenience stores. However, there are nuances. If you're spending most of your time in Tokyo, Suica or PASMO is the way to go since they are primarily used in the Kanto area. Conversely, if Osaka and Kyoto are on your radar (which they should be during your 14 days in Japan), ICOCA is the smart choice.
For example, I’ve seen travelers arrive in Tokyo with an ICOCA card only to realize that it doesn’t work effectively for their needs. They end up buying a second card like Suica just to navigate the subway system efficiently. Talk about unnecessary hassle!
The key here is flexibility. While these cards are great for transportation within their respective regions, they also have interoperability. That means you can use a Suica card in Osaka and an ICOCA card in Tokyo; however, it's best to get the one specific to where you'll spend most of your time.
Here’s a quick overview:
- Suica: Best for Tokyo and surrounding areas. Perfect if you’re diving deep into the capital.
- PASMO: Also ideal for Tokyo; works interchangeably with Suica but not as widely recognized outside Kanto.
- ICOCA: Your go-to for Kansai region travel (Osaka, Kyoto). If these cities are major stops on your itinerary, grab this one.
In my experience, getting an IC card upon arrival is a no-brainer. Just head straight to the airport station or any train terminal; you’ll find vending machines that dispense them easily. Reloading is straightforward too—just look for those automatic machines or convenience stores.
This strategy lays the groundwork for seamless transport as you move through your 14 days in Japan. With your IC card ready, let’s keep this momentum going as we explore how to maximize your travel experiences further with other tips in our upcoming section.
Navigation Apps & Offline Maps
Before diving into Navigation Apps & Offline Maps, let’s set the essentials. Having a reliable navigation tool is crucial in Japan, especially if you’re on a tight schedule during your 2 week Japan itinerary. Whether you're hopping between Tokyo, Kyoto, and Osaka or exploring hidden gems, these tools will save you time and stress.
First off, let’s talk about apps. One standout is Google Maps. It’s not only user-friendly but also provides real-time public transport updates and walking directions. In my experience, I’ve relied heavily on it while navigating Tokyo's complex train system. I often found myself in busy stations like Shinjuku and Shibuya, where getting lost feels inevitable. Google Maps helped me locate exits and even showed me how crowded trains were at different times.
But here’s the trick: always download offline maps ahead of your trip. While Wi-Fi is widely available in Japan, having your map accessible without data can be a lifesaver when you’re off the beaten path. The good news? You can save offline maps directly within Google Maps or use apps like Maps.me for seamless access without internet connection.
Speaking of alternatives, don’t overlook Hyperdia. This app is specifically designed for navigating Japan's railways, making it ideal for first-time travelers or anyone tackling a packed Japan itinerary 2 weeks. It shows train schedules and allows you to find routes quickly based on your desired departure times.
- Google Maps: Great for general navigation and public transport info.
- Maps.me: Excellent for offline access; download specific areas beforehand.
- Hyperdia: Best choice for train travel; plan routes efficiently with real-time updates.
The key here is preparation: take 20-30 minutes to familiarize yourself with these apps before heading out each day. This simple practice can enhance your travel experience tremendously.
Ultimately, while navigating Japan might seem daunting at first, these tools empower you to explore confidently. Armed with the right information, you'll seamlessly transition into the next stage of your adventure—traveling through Japan's incredible sights.
Budget & Trip Costs (Per Day & Total)
Critical point: budgeting for your trip can make or break your experience in Japan. You might think you have a handle on costs based on online estimates, but trust me, the reality can be quite different.
When planning a two-week Japan itinerary, you'll want to understand your daily expenses and total budget. This isn’t just about flights and hotels; it’s the little things that add up, from meals to transportation. Here’s a breakdown of what you should expect.
First, let’s talk about **accommodation**. A decent hotel in Tokyo can set you back around $100-200 per night for a mid-range option. In Kyoto and Osaka, prices might drop to $80-150. If you're aiming to save, consider hostels or guesthouses where prices can be as low as $30-50. I remember booking a capsule hotel in Tokyo once for just $40, and it was a unique experience!
Next up is **food**. If you’re enjoying casual dining like ramen or curry rice, budget about $10-15 per meal. For three meals a day over two weeks, that’s approximately $420 ($15 x 3 meals x 14 days). Don’t forget to treat yourself to sushi or kaiseki dining at least once—those experiences might cost around $50-100.
Transportation is another major player in your budget game. Using IC cards like Suica or PASMO is practical for city travel; budget around $10-15 daily for subway rides in Tokyo or commuting between cities via shinkansen (which we've discussed before). A one-way ticket from Tokyo to Kyoto can be about $130 if not booked ahead. Over two weeks, consider setting aside about $400 for transport overall.
So far, if you're tracking these numbers, you're looking at:
- Accommodation: ~$1,400 ($100 x 14 nights)
- Food: ~$420 ($15 x 3 meals x 14 days)
- Transportation: ~$400 (including some shinkansen)
This totals around **$2,220** for basic expenses over two weeks! Keep in mind this doesn’t include entry fees for attractions or personal shopping.
I recommend keeping an eye on your spending with apps like Trail Wallet or Mint during your travels. It really helps to visualize where the money goes—and avoids that painful realization at the end of your trip when you realize you overspent.
In my experience, it’s also wise to carry some cash as not all places accept cards (especially smaller shops). About **$300-$500** in cash should keep you covered for local purchases and incidentals.
This budget overview should give you a solid understanding of how much to save up before your adventure. Watch this nuance: adjusting your itinerary according to your budget can often lead to even more rewarding experiences—like discovering hidden gems instead of tourist traps!
Now that we’ve covered the financial aspect of traveling Japan, let’s shift gears and dive into how to make the most out of limited time with an effective itinerary!
Sample Budgets: Backpacker / Mid-Range / Comfort
Let’s break it down. When you’re planning a trip to Japan, having a clear idea of your budget can make or break your experience. After discussing transportation options like Suica and PASMO, it's crucial to look at what your daily expenses could be across different travel styles: backpacker, mid-range, and comfort.
First up, the backpacker budget. This is for those who want to stretch every yen while exploring. Expect to spend about $50-70 a day. Here’s a quick breakdown:
- Accommodation: Hostels or shared rooms averaging $20-30.
- Food: Convenience store meals or cheap ramen for around $10-15.
- Transportation: Use local trains and buses, spending roughly $5-10.
- Sightseeing: Many temples and parks are free or under $5.
In my experience, sticking to local eateries not only saves money but also gives you an authentic taste of Japanese culture.
Now, let’s talk about the mid-range budget. If you’re willing to splurge a bit more for comfort without breaking the bank, aim for about $100-150 daily. Here’s how that looks:
- Accommodation: Business hotels or boutique guesthouses at around $70-100.
- Food: Dine at izakayas or casual restaurants costing about $20-30.
- Transportation: More frequent use of shinkansen (bullet trains) might bring costs to $20-30.
- Sightseeing: Entry fees for attractions like museums could total around $10-20.
This balance allows you some flexibility in activities without feeling too restricted. Trust me, trea
For those planning a trip, understanding the budget Japan options can help you make the most of your experience without breaking the bank.
ting yourself to one nice meal can elevate your entire day!
If you're looking for ultimate comfort, the comfort budget, which ranges from $200 upwards per day, is where you'll want to be. Here's what you should expect:
- Accommodation: Luxury hotels starting at $150-300.
- Food: Fine dining experiences costing upwards of $50 per meal.
- Transportation: Frequent taxi rides or business class shinkansen tickets at about $50+ per trip.
- Sightseeing: Guided tours can range from $30-100 depending on the experience.
This level of spending ensures top-notch experiences but can add up quickly if not monitored. Always keep an eye on your expenses!
No matter which budget you choose, understanding these financial frameworks is essential as you navigate through your 14 days in Japan. Next up, we’ll delve into how these budgets can influence your 2-week Japan itinerary and maximize your travel experience!
How to Save on Trains, Food & Attractions
Here’s where it gets interesting. Saving money on trains, food, and attractions can make or break your 2-week Japan itinerary. Why? Because these are the biggest expenses you'll encounter during your trip. Let's dive into how to maximize your budget without sacrificing experience.
First up, train travel. Japan's rail network is efficient, but costs can add up quickly if you’re not careful. One of my favorite hacks is the Japan Rail Pass. It’s a game changer for travelers planning to visit multiple cities like Tokyo, Kyoto, and Osaka. For around $300 for a 7-day pass, unlimited travel on JR trains is yours—far cheaper than buying individual tickets. Just make sure to purchase it before arriving in Japan; trust me, it’s worth every penny.
And if you plan to stick to one area, consider local passes that offer discounts on specific train lines and buses. I once saved about 25% just by opting for a regional pass while exploring the Kansai area.
Now let’s talk about food. Eating out in Japan can range from super cheap ramen shops to pricey sushi bars, but you don’t have to break the bank. Convenience stores like 7-Eleven and FamilyMart offer delicious bento boxes and snacks at reasonable prices. You can easily grab a filling meal for under $5! In my experience, eating like a local not only saves money but also gives you a taste of authentic Japanese cuisine.
Don’t overlook lunch specials at restaurants too; many places offer reduced prices during midday hours. Plus, if you're in a city with street markets, those stalls often serve up fresh and affordable options that are as good as any sit-down meal.
Lastly, when it comes to attractions, look into free or discounted days. Many museums and temples have specific days where entry fees are waived or reduced. Also consider city passes that bundle multiple attractions together for one low price; these can save you both time and money. A friend of mine used the Kyoto City Pass during her trip and saved nearly 40% on admission fees.
The key here is planning ahead—by knowing what your options are before you go, you can enjoy all that Japan has to offer without feeling guilty about overspending. With smart choices in trains, food, and attractions, you'll have more yen left over for those cute souvenirs!
With these tips under your belt, you're ready to tackle budgeting with confidence. Up next? We’ll explore some sample budgets based on different travel styles so you can tailor your experience even further!
Cash vs. Cards: ATMs & Payment Tips
This is where it gets serious. Managing money in Japan can seem tricky, especially when you’re deciding between cash and cards. Both have their pros and cons, but knowing how to navigate ATMs and payment methods will save you time and headaches.
First, let’s talk about cash. Japan is still a cash-centric society, despite being technologically advanced in many ways. In fact, around 80% of transactions are made using cash. When you step into a small shop or local restaurant, chances are they won’t accept credit cards. So, what’s the strategy?
I recommend carrying a mix of cash and cards. You’ll want enough cash for daily expenses—think about ¥10,000 to ¥20,000 (around $90-$180) as a safe amount for a day of exploration. ATMs are widely available, but not all of them will accept foreign cards. Here are some reliable options:
- Seven Bank ATMs: Located in 7-Eleven stores, they accept most international cards and offer English instructions.
- Japan Post Bank: Found at post offices throughout the country; also friendly for foreign cards.
- Lawson ATMs: These machines are another great option that usually work with international credit/debit cards.
In my experience, I’ve often found myself in situations where only cash was accepted. For example, during my last trip to Kyoto, I tried to pay for a delicious bowl of ramen with a card—no luck! Thankfully, I had enough yen on me to cover the meal.
Now let's tackle cards. Credit cards are becoming more accepted in urban areas like Tokyo and Osaka but be wary of smaller venues or rural locations where they might not be an option at all. Plus, some places may charge fees for card payments—a classic move to encourage cash use.
The key here is planning ahead. Before you travel, inform your bank about your trip to avoid any issues with international transactions. Check for any foreign transaction fees too; some banks offer no-fee options which could save you money over your two-week Japan itinerary.
As we move into discussing the best practices for saving on your budget during your travels—including how to maximize your experience without overspending—remember that managing your money wisely can lead to smoother adventures.
Food & Experiences You Shouldn’t Miss
Now, let’s dive into a part of your journey that’s as crucial as your budget or train routes: the food and experiences you simply cannot miss while traveling in Japan. You might be thinking, "Sure, I’ll find something to eat," but trust me, the culinary landscape here is a vibrant tapestry of flavors waiting to be explored.
First off, street food is an adventure in itself. Just think about it: wandering through the bustling alleys of Osaka and being tempted by the aroma of takoyaki (octopus balls) sizzling on the griddle. This isn’t just food; it's a slice of local culture. In my experience, grabbing a few snacks from street vendors before diving into a full meal gives you a real taste of what Japan has to offer.
But hey, don’t limit yourself to street eats! Traditional sushi experiences are essential. For instance, sitting at a sushi counter in Tokyo’s Tsukiji Outer Market lets you interact with chefs and savor fresh fish that just melted in my mouth. Make sure to try omakase, where the chef decides your courses based on what’s freshest that day—it's like a culinary gift!
Next up is kaiseki, the art of Japanese multi-course dining. This is not just about eating; it’s about experiencing harmony through food presentation and seasonal ingredients. I remember having kaiseki in Kyoto—each dish felt like a mini-masterpiece on my plate, reflecting both the season and the chef's creativity. An unforgettable experience like this isn’t just dinner; it’s an immersion into Japanese aesthetics.
If you're a fan of unique experiences, consider participating in a traditional tea ceremony. It's surprisingly calming and gives insights into Japanese customs that go beyond mere sipping of tea. You’ll learn about precision and patience—qualities that are deeply woven into Japanese culture.
- Try ramen in Fukuoka—the birthplace of tonkotsu ramen.
- Visit an izakaya for some casual drinking and sharing plates with locals.
- Explore convenience stores: yes, they have delicious ready-to-eat meals!
- Savor wagyu beef, especially in Kobe—it’s an absolute treat!
- Don’t skip dessert: mochi ice cream is a must-try for its unique texture!
The beauty here lies not just in eating but also in how food connects you with people and places—each bite tells a story. As you craft your 2 week Japan itinerary, make space for these food experiences; they will enrich your travel narrative far more than any guidebook can describe.
And remember, this is just one aspect of your journey. Next up: let’s uncover how to navigate Japan's cities efficiently and enjoyably without losing time or getting overwhelmed.
Sushi, Ramen, Izakaya & Street Food by City
When diving into the culinary delights of Japan, you'll find that Sushi, Ramen, Izakaya & Street Food vary significantly from city to city. This is where regional specialties shine, making your taste buds dance with excitement. Each dish has its unique story, influenced by local ingredients and traditions.
Let’s break it down a bit. In Tokyo, sushi reigns supreme. Here, you can enjoy everything from conveyor belt sushi (kaiten-zushi) to high-end omakase experiences. A must-try is the nigiri at Sukiyabashi Jiro, which has gained fame through documentaries and will set you back around ¥30,000 ($275) for an unforgettable meal. Just remember—good sushi isn’t just about price; it’s about the quality of fish and the skill of the chef.
Moving to Osaka, things take a different turn. This city is known for its comfort food. You cannot miss trying takoyaki (octopus balls) from street vendors in Dotonbori or okonomiyaki, a savory pancake packed with various fillings. The atmosphere here is lively; as you wander the streets, the sizzling sounds and enticing aromas invite you to dive into the local food culture.
Don’t overlook Kyoto, either! While it’s famous for its temples and gardens, kaiseki ryori (traditional multi-course dining) offers a beautiful presentation of seasonal ingredients that reflect the changing seasons. You'll feel like you're eating art on a plate! I’ve had some of my most memorable meals here that were not just filling but also a feast for the eyes.
- Tokyo: Sushi (kaiten-zushi & omakase), try Sukiyabashi Jiro.
- Osaka: Street food like takoyaki and okonomiyaki are a must.
- Kyoto: Experience kaiseki ryori for exquisite seasonal dishes.
The key takeaway? Don’t stick to one type of cuisine while traveling through Japan; embrace the regional specialties! Each city has its gems waiting to be discovered. By immersing yourself in this culinary adventure, you’ll gain deeper insights into Japanese culture—beyond just sushi rolls and ramen bowls.
This exploration sets you up nicely for what comes next: discovering how to navigate Japan’s vibrant dining scene effectively and what tips will save your wallet while tasting the best eats during your 2 week Japan itinerary. Get ready; your taste journey is just beginning!
Tea Ceremonies, Onsens & Themed Cafés
Let’s zoom into what matters. Japanese culture is not just about delicious food and advanced technology; it’s steeped in traditions that create memorable experiences. Tea ceremonies, onsens, and themed cafés are essential parts of the cultural tapestry you’ll want to explore during your visit.
First up, tea ceremonies. These aren’t just about sipping matcha; they're rituals infused with deep meanings and meticulous attention to detail. The process can take over an hour, guiding you through the steps of preparation and consumption. In my experience, attending a tea ceremony at a traditional teahouse in Kyoto was eye-opening. You’ll learn that each movement has significance—like how the tea is whisked to achieve the perfect froth. Expect to pay around ¥3,000 for a session, which includes the tea and sometimes snacks.
Next on the list are onsens, or hot springs. Japan boasts thousands of these relaxing havens. They’re perfect for winding down after a day of sightseeing. For a truly authentic experience, head to Hakone or Beppu; both locations have stunning views and unique thermal waters rich in minerals. Here’s a tip: the best times to visit onsens are early in the morning or late at night when they’re less crowded. Some onsens even allow you to book private baths—perfect for couples looking for a romantic evening.
Themed cafés are where things get fun and quirky! Think cat cafés, owl cafés, and even maid cafés in Akihabara where servers dress in costumes and treat you like royalty. I once visited a rabbit café in Tokyo; it was surreal being surrounded by fluffy companions while sipping my latte. Prices vary widely depending on the concept but expect to spend around ¥1,500 for an hour-long session with your animal buddies.
Ojo con esto: each experience offers a peek into Japanese culture beyond mere sightseeing—an opportunity to connect with traditions that make Japan unique. Integrate these activities into your 2-week Japan itinerary, and you won’t regret it! Now that you've got some cultural insights under your belt, let’s dive into how cash can impact your adventures.
Cultural Do’s & Don’ts at Shrines and Temples
Understanding the cultural do's and don'ts at shrines and temples is essential for a respectful experience in Japan. These sacred spaces are steeped in tradition, and how you conduct yourself can either enhance your visit or lead to unintentional faux pas.
First off, let’s talk about purification. Before entering a shrine or temple, you’ll find a temizuya, a purification fountain. It’s customary to wash your hands and mouth here. Use the ladle to scoop water, rinse your left hand first, then your right, and finally rinse your mouth (spit the water away from the fountain). This ritual symbolizes cleansing before approaching the deities.
Here’s a real-life example: on my first visit to Fushimi Inari Taisha in Kyoto, I forgot this step and walked straight in. A nearby visitor kindly gestured towards the temizuya, avoiding any embarrassment. Learning from that moment, I now pay extra attention to this detail.
- Bow at the entrance: As you enter a shrine, bow respectfully. This shows acknowledgment of the sacred space.
- No photography: While many places allow it, some shrines strictly prohibit taking photos inside. Always look for signs.
- Keep quiet: Temples are places of meditation; maintaining a low volume is appreciated.
- Avoid pointing: Instead of pointing with your finger, use your whole hand to indicate something. This is seen as more respectful.
- Dress appropriately: Keep it modest; revealing clothing is frowned upon in these spiritual settings.
The key here is to observe others and adapt as necessary. I’ve seen travelers make mistakes but recover gracefully by simply following local customs after realizing their errors.
Keeping these tips in mind will not only enhance your visits but also deepen your appreciation for Japan’s rich cultural heritage. Now that you're equipped with this knowledge, let’s delve into how to plan an exciting 2-week itinerary that includes those must-see shrines and temples!
Packing List & Travel Essentials
Let’s break it down. Packing for Japan can feel overwhelming, especially when you're trying to balance comfort, practicality, and style. As you plan your 2 week Japan itinerary, the essentials you choose to bring can make or break your experience. You’ve tasted the delights of sushi and ramen, explored tea ceremonies, and navigated the cultural do’s and don’ts at shrines and temples; now it's time to ensure you're ready for any adventure.
First things first: consider the season you'll be visiting Japan. The climate varies widely depending on when you go, from hot and humid summers to chilly winters. I once packed a lovely jacket for a summer trip—guess what? I ended up sweating more than enjoying the sights. So, always check the weather forecast before packing!
- Layered Clothing: Bring layers that are easy to mix and match. A light jacket or cardigan is perfect for those cool evenings after a long day of exploring.
- Comfortable Shoes: You'll be walking a lot (think subway stations and endless streets). Invest in a good pair of shoes; trust me, your feet will thank you later.
- Portable Charger: With all those selfies at shrines and temples, you'll need power! A portable charger is crucial for keeping your devices alive while navigating your first time Japan itinerary.
- Universal Adapter: Don't get caught out—Japan uses Type A and B plugs. An adapter is a must if you want to charge your devices without hassle.
- Cultural Essentials: Pack a small gift from home (like local sweets). It’s a great way to connect with new friends in Japan as gifts are an integral part of their culture.
An interesting tip: I’ve seen many travelers lug around heavy suitcases filled with clothes they never end up wearing. Instead, choose versatile items that can create different outfits. Even consider doing laundry midway through your trip—it’s easier than carrying everything!
The key here is preparation without overpacking. You want to enjoy Japan's rich culture without feeling weighed down by your belongings. And here comes the trick: using packing cubes can help organize your suitcase efficiently; they keep everything neat and compact.
As you finalize your packing list, remember that less is more. This approach leaves room for souvenirs—a sweet box of matcha treats or unique trinkets from local shops won’t fit if you’re overly packed.
Now that you're equipped with packing strategies, let’s glide into the next part—how to navigate transportation in Japan seamlessly.
Luggage Strategy for Shinkansen (Forwarding Services)
What many travelers overlook is the power of a solid luggage strategy when navigating the Shinkansen. Instead of lugging your bags across platforms and into busy train cars, you can make use of forwarding services that take care of your luggage for you. This not only saves you time but also energy, allowing you to focus on enjoying your trip.
Here’s how it works: Japan has various luggage forwarding services, such as Yamato Transport (Kuroneko), Sagawa Express, and even airport hotels that can facilitate this service. For instance, if you're traveling from Tokyo to Kyoto, you can send your suitcase ahead to your hotel in Kyoto. Generally, it takes about one day for your luggage to arrive at its destination, so plan accordingly. You just need to drop off your bags at a designated point before 11 AM for same-day delivery.
In my experience, this option has been a game changer. I recall my first trip to Japan, where I foolishly tried to juggle my bags while exploring cities. By the time I got on the train, I was exhausted and missed out on some beautiful sights. Trust me; it’s a much smoother experience when you don’t have to drag your belongings around.
- Research Services: Check which forwarding service works best for your itinerary. Most major hotels in Japan can assist with this.
- Pack Smart: Keep essentials in a smaller bag—this will allow you to travel light while waiting for your main luggage.
- Consider Costs: Sending luggage typically costs between ¥1,500-¥3,000 ($15-$30), depending on size and distance.
- Timing Is Key: Make sure to send your luggage early enough if you’re catching a train later that day.
- Label Your Bags: Clearly label your bags with your contact information and hotel details to avoid any issues upon arrival.
The convenience of using these services allows you to navigate Japan with much less stress. It frees you up for things like tea ceremonies or relaxing in an onsen without the burden of heavy bags weighing you down.
This strategy becomes even more valuable as we shift towards planning out our two-week itinerary in Japan. Let’s now explore how cultural do's and don'ts at shrines and temples play an important role in enhancing that travel experience.
Power, Connectivity & Meds
This is where it gets serious. Keeping your devices charged and ensuring you have access to essential medications can make or break your trip in Japan. Let’s dive into the nitty-gritty of power, connectivity, and what to do about your meds while navigating this incredible country.
First off, let’s talk about power. Japan uses Type A and B plugs with a voltage of 100V. If you’re coming from a country with different plug types, a universal adapter is a must-have. You can pick one up at any electronics store in Japan or even order it online before your trip. I learned the hard way; during my first visit, I had to scramble to find an adapter, which ate into my sightseeing time.
Next on the agenda: connectivity. While Japan is well-known for its advanced technology, staying connected can be tricky without planning ahead. Consider renting a pocket Wi-Fi device upon arrival or getting a local SIM card if you're going to be here for two weeks or more. This will allow you to navigate public transport apps and stay connected with friends and family back home. Trust me, being offline in a new city is less than ideal.
When I visited Kyoto, I relied heavily on Google Maps for everything from finding temples to choosing restaurants. A pocket Wi-Fi made all the difference—I was able to look up information on-the-go without worrying about data roaming charges.
Now let’s not forget about medications. If you're on any prescription drugs, bring enough for your entire stay (and a little extra just in case). Japanese pharmacies can differ greatly from what you may be used to at home—over-the-counter options might not include your preferred brands or formulas. If you're unsure about what you need, consider packing a doctor's note that details your prescriptions; it can help when explaining your needs at local pharmacies.
- Universal Adapter: Essential for charging devices—don’t leave home without it!
- Pocket Wi-Fi: Keep connected wherever you roam—rental kiosks are common at airports.
- Prescription Meds: Bring enough for two weeks plus extra; also consider a doctor’s note.
The key here is preparation. Addressing power issues, ensuring reliable internet access, and taking care of your medication needs will significantly enhance your experience as you explore Japan over these fourteen days. Up next? We’ll take a look at how to handle local transportation like a pro as we continue this journey together.
Weather-Smart Clothing (By Season)
When we talk about Weather-Smart Clothing (By Season), one detail stands out: knowing what to wear can make or break your experience in Japan. Each season brings its own unique weather challenges, so dressing smartly is not just about comfort; it’s about fully enjoying your 2-week Japan itinerary.
Spring in Japan is lovely, but the weather can be unpredictable. Temperatures range from cool to warm, with rain showers sneaking in. I recommend layering—think lightweight shirts under a cozy cardigan. This way, you can easily adjust as the day warms up or cools down. And don’t forget a compact umbrella! In my experience, packing one saves you from those unexpected showers.
Summer, on the other hand, is hot and humid, especially in cities like Tokyo and Osaka. You’ll want to wear breathable fabrics like cotton or linen. Opt for loose-fitting clothing that allows airflow. A wide-brimmed hat and sunglasses are essential here—not only for style but also for sun protection. Trust me, wandering through Kyoto's temples in summer heat without proper gear can lead to a very grumpy traveler!
As autumn arrives, Japan transforms into a vibrant tapestry of colors. The temperatures drop significantly, so it’s time to break out your warmer layers. Think about investing in a light down jacket—it packs small and keeps you warm without being bulky. Pair it with a scarf for added warmth and style as you stroll through parks filled with falling leaves.
Winter can be surprisingly chilly, especially if you're heading to places like Hokkaido or the Japanese Alps. Here’s where thermal layers come in handy; they’ll keep you warm without adding too much bulk. A good pair of waterproof boots will also be your best friend if you plan on exploring snowy areas.
The key takeaway? Dress for the season while considering activities on your 14 days in Japan. Remember that local shops often sell seasonal items at reasonable prices; so if you’re short on space or need something specific for the weather, it’s usually easy to find.
Your next stop will be understanding how to navigate Japan’s unique transport systems—so let’s dive into that!
FAQs (Real User Questions)
This is where it gets serious. As you prepare your 2 week Japan itinerary, it’s natural to have questions about what to expect on your journey. The experience of traveling in Japan can be daunting, especially if it’s your first time navigating the bustling cities or planning multiple destinations like Tokyo, Kyoto, and Osaka. Here, I’ve compiled some real user questions that come up frequently.
One of the most common queries I encounter is about transportation options. Many travelers wonder, “Should I get a Japan Rail Pass?” In my experience, this can be a game-changer for a 14 days in Japan trip. For example, if you plan on taking the Shinkansen (bullet train) several times, the pass often pays for itself within just a few rides. However, if you're focusing only on local sights in Tokyo or Osaka, it might not be worth the investment.
Another popular question revolves around luggage logistics: “What should I do with my bags while exploring?” A smart solution is to utilize forwarding services as discussed earlier. This way, you can travel lighter and enjoy your day trips without dragging your suitcase along. Remember to book these services in advance to avoid last-minute stress!
- Connectivity: “How can I stay connected while traveling?” Consider getting a pocket Wi-Fi device or a local SIM card upon arrival. These tools ensure that you can access maps and translation apps easily.
- Cultural norms: “What should I know about Japanese customs?” Simple gestures like bowing when greeting or thanking someone go a long way in showing respect.
- Weather considerations: “What’s the best clothing for different seasons?” The key here is layering—this allows you to adapt as the weather changes throughout the day.
A unique concern many first-time travelers share is related to food: “How do I navigate restaurants if I don’t speak Japanese?” Many places have pictures on their menus or use tablets with images for ordering. Plus, being adventurous and trying local specialties will enrich your experience! You might discover dishes you never knew existed.
If you're still figuring out how to craft the perfect first time Japan itinerary, don't hesitate to seek advice from fellow travelers online or on social media groups dedicated to Japan travel. Engaging with others who've walked the same path can provide insights that guide your planning process effectively.
Your adventure awaits! As you step into the vibrant world of Japan with all its wonders, the next section will dive deeper into essential packing tips for ensuring a smooth journey.
Now you’ve got a solid two-week Japan itinerary in your hands—one that will turn your trip into an unforgettable experience. All you need to do is decide when you’re going and how you’ll put these tips into action.
The question is: are you going to make that Japanese dream come true, or keep wondering “what if”? The next step is clear: start booking your flights and building your must-see list. Don’t let fear or indecision hold you back; the adventure is waiting for you.
Make the most of every opportunity—life’s too short to pass on once-in-a-lifetime experiences. Remember, the memories you create in Japan will stay with you forever. Go for it!